A Step-by-Step Approach to Creating your School's Google Calendar
Following on from our earlier article on the use of Google Calendars in Schools.
This post describes a step-by-step approach to setting up a Google Calendar
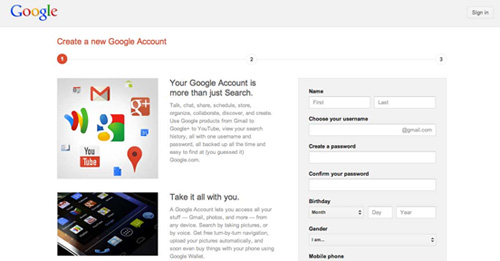
1. Create a new Google Account
If you don’t already have a Google Account, create one here (https://accounts.google.com/)
Check to see if the school you work for does not already have an official Google Account, if it does, it may be worth checking to see if you can use that same account to manage Google Calendars.
If not, create a new profile on Google. The username does not necessarily need to be based on the school name. As it is possible to publicly share calendars, you can create a personal Google Account and still manage a School Calendar.
Following on from our earlier article on the use of Google Calendars in Schools.
This post describes a step-by-step approach to setting up a Google Calendar
2. Log-in and Go to Calendar
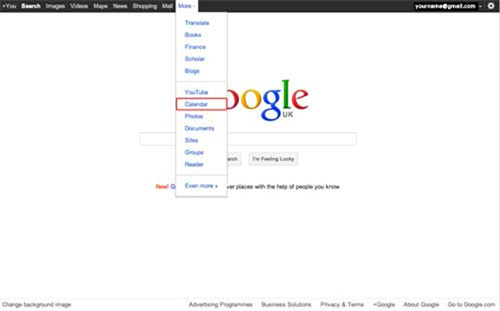
Once you have logged in to your Google account, your email address will appear on the top right in the black menu bar.
If the Calendar option is not on the main menu, click on the Drop-down arrow next to More. This will show a number of different options. Select Calendar from the list.
3. Accessing your Google Calendar
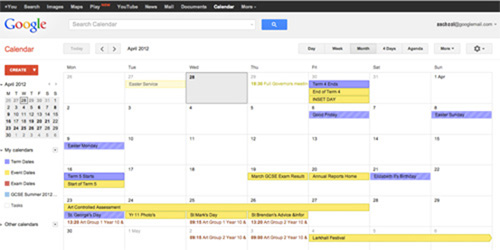
Once you have your Calendar open, to add events to your Calendar it is as easy as clicking on the Create button (in red) and adding the details.
However, I would recommend that instead of just adding events, first create a new Calendar. That way, you can customise the associated sharing options of a calendar, instead of sharing what could potentially be a calendar with personal dates and details.
4. Setting up a New Calendar
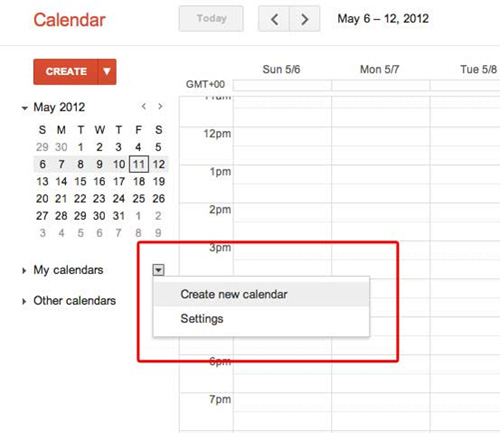
To create a new calendar, click on the little drop down arrow next to ‘My calendars’
It will open another page where you can customise the Calendar details.
5. Customising your Calendar
On this page, you can give your Calendar a name (for e.g. Bright School Events Calendar or Bright School PTA Calendar).
And fill in the other details such as Organisation, Description etc.
Then we come to the Sharing options on the Calendar.
Author: Li-ling, tweets as DrOoi and is passionate about all things learning.
To make sure you continue to receive interesting exciting articles at the forefront of learning with technology, remember subscribe to our updates below and follow @ColorMyLearning on Twitter and Like us on Facebook.
You will benefit from a newsletter updates straight to your mailbox from ColourMyLearning on the use of Technology for Teaching and Learning.
Recommended Read: A Quick Guide to Google Calendar for Schools
Don’t forget to rate the article.
