15 Ways to Make the Most of Notes in iOS, iPadOS and macOS: Go beyond just a text editor
The free Notes app gets more and more features added. Apart from having all your notes synchronised across all your devices be it iPhone, iPad, MacBook and iMac via iCloud, you can use it to collaborate with others too. Here is a quick guide to help you make the most of the app, exploring features you might not already know.
To make Notes even more powerful, Apple has introduces Quick Notes in macOS Monterey. This means you can access your notes quickly and easily with options to tag and categorise them. On top of that and all the features we are going to discuss in detail here is the Continuity feature. Effortless and seamless sharing between iOS and MacOS, allowing you to drag scribbles, notes, photos etc from one device to another.
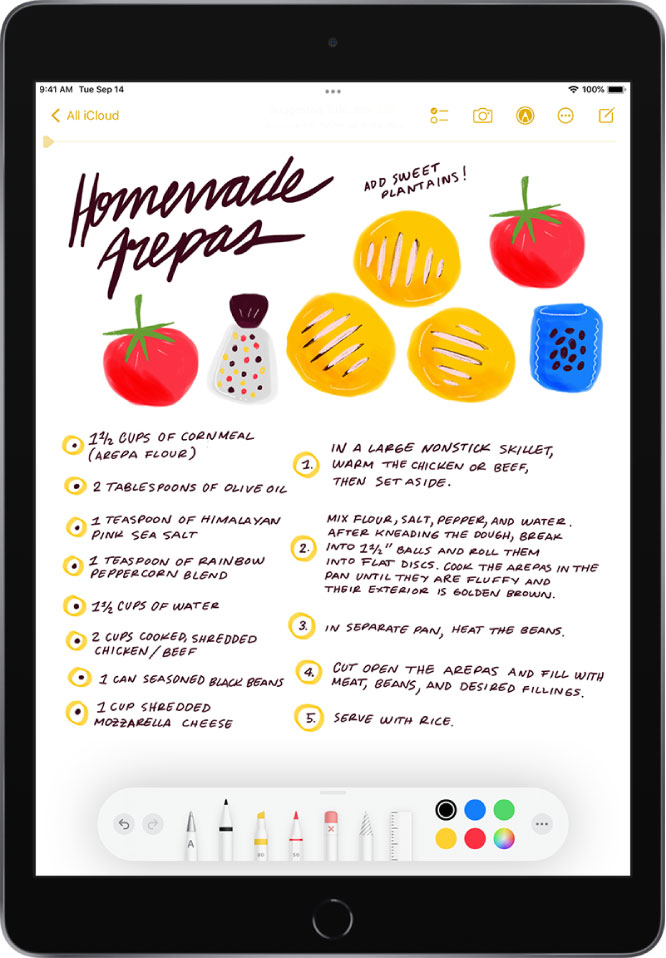
Who would have thought that the included Notes on iOS and macOS can be so powerful. Make the most of it on the iPad, iPhone or Mac with onboard camera, Apple Pencil and iCloud sync.
Search Apple Pencil for iPad on Amazon
Access your Notes from Any Devices
I am one of Notes biggest fans. Not only does it sync your iCloud notes, you can set it to sync notes from 3rd party accounts such as Gmail too. This means if you have an Android device, it can be setup to access Gmail’s notes making it available cross platform. However, to make the most of Notes, and to support the various features discussed here, you will need to create your notes on the iCloud folder.
Some of you might say that it’s all well and good when one is totally invested in Apple’s ecosystem with various iOS and MacOS devices but what if you only have the one Apple device. You can still take advantage of Notes via the web browser. Head over to www.icloud.com and login with your Apple ID. You may need to authorise the browser on your chosen device (Mac, Windows or Android) with a 6 digit pin sent to your iOS / Mac device. Once you are logged in, you can access your notes there making them universally available on any browser.
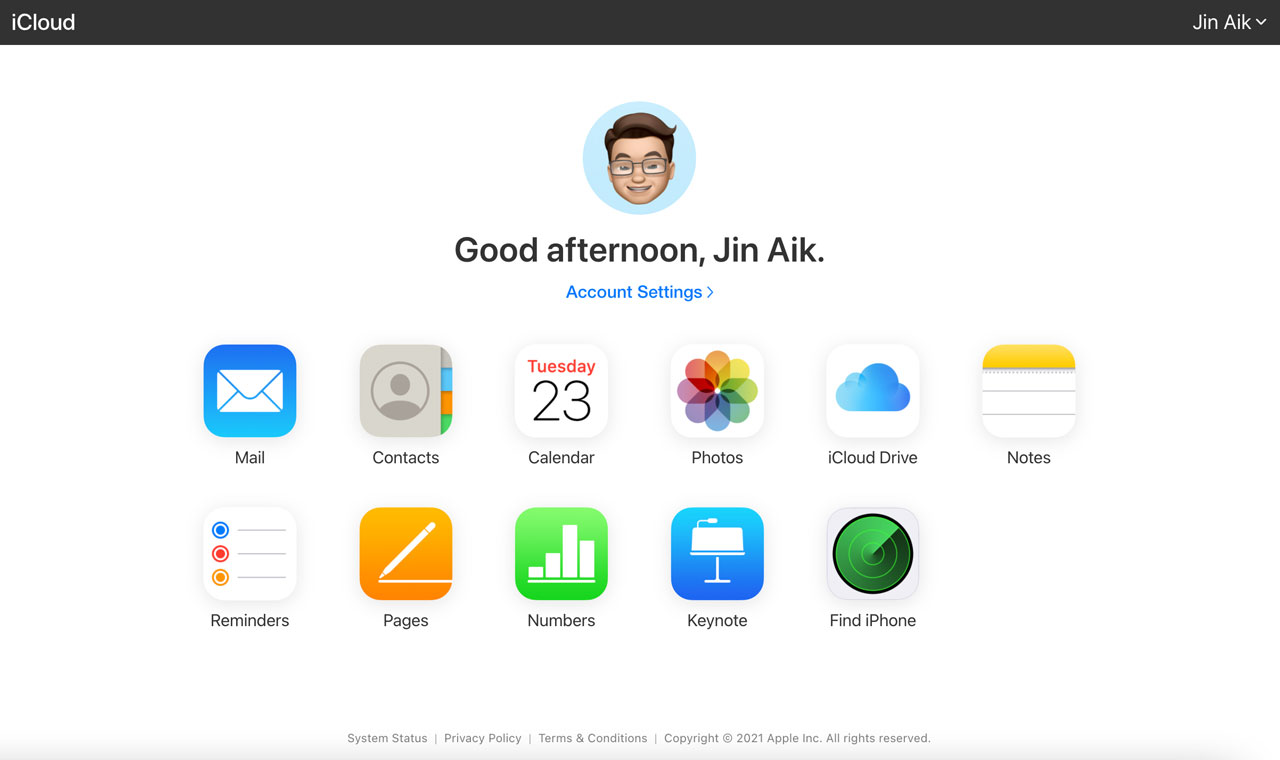
Caveat: You will need an AppleID and have iCloud sync setup in order to access your notes online.
Overview
Here is a quick overview of what to expect from our guide:
- Formatting your notes
- Adding useful grid lines
- Creating folders, and organising your notes (adding, moving, deleting)
- Sharing your notes and good practise
- Password protect your notes
- Scanning Documents to add to your notes
- Add an existing photo or video or take one for your notes
- Adding a table including manipulating and deleting the table
- Sharing and collaborating on notes and folders
- Tagging, @mentions, track changes, smart folders, activity viewer
We assume that everyone can create a new note in the Notes app. Pick the iCloud folder and create your notes there. We also assume that those with an Apple Pencil knows how to scribble on their Notes on the iPad. Just tap on the pencil icon and write away. Now for the fun stuff.
1. Formatting your notes
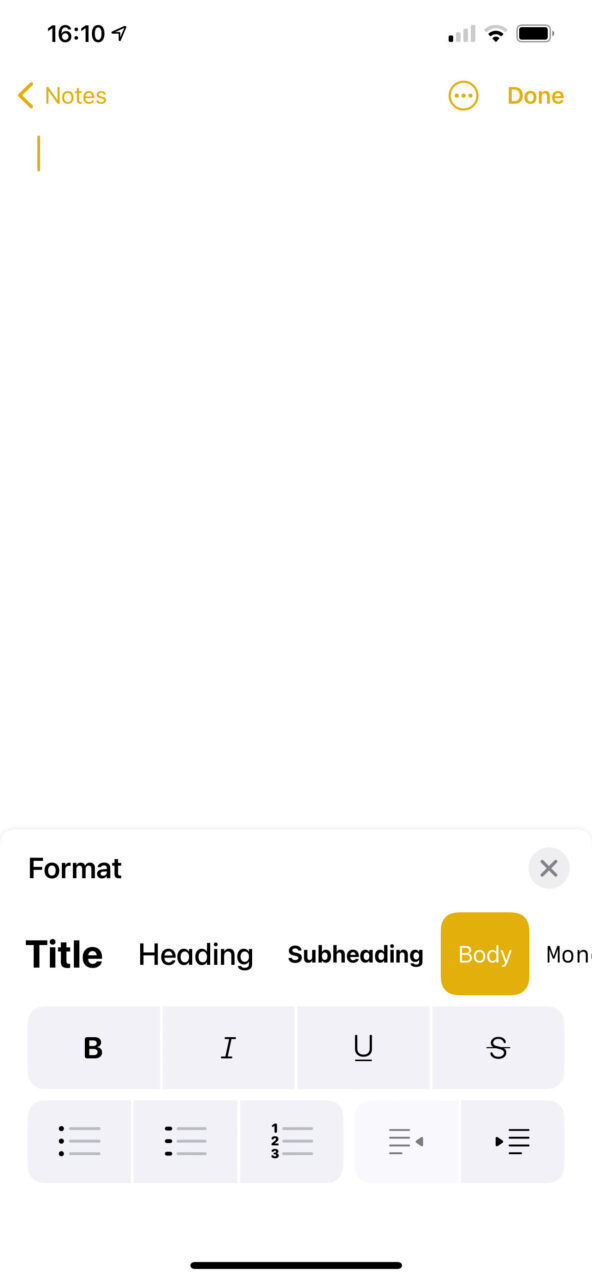
Gone are the days where Notes is nothing more than a glorified Notepad’s or Text Editor. You can now format your text on notes with basic options like bold, italize, underline and strike out. More advanced options such as Title, Heading, Subheading, body text and monospaced are also available. For lists, choose from bullet, dash or numbered. To access these text style tap on [Aa] icon, the format slide up panel will appear, see screenshot below.
2. Adding useful grid lines
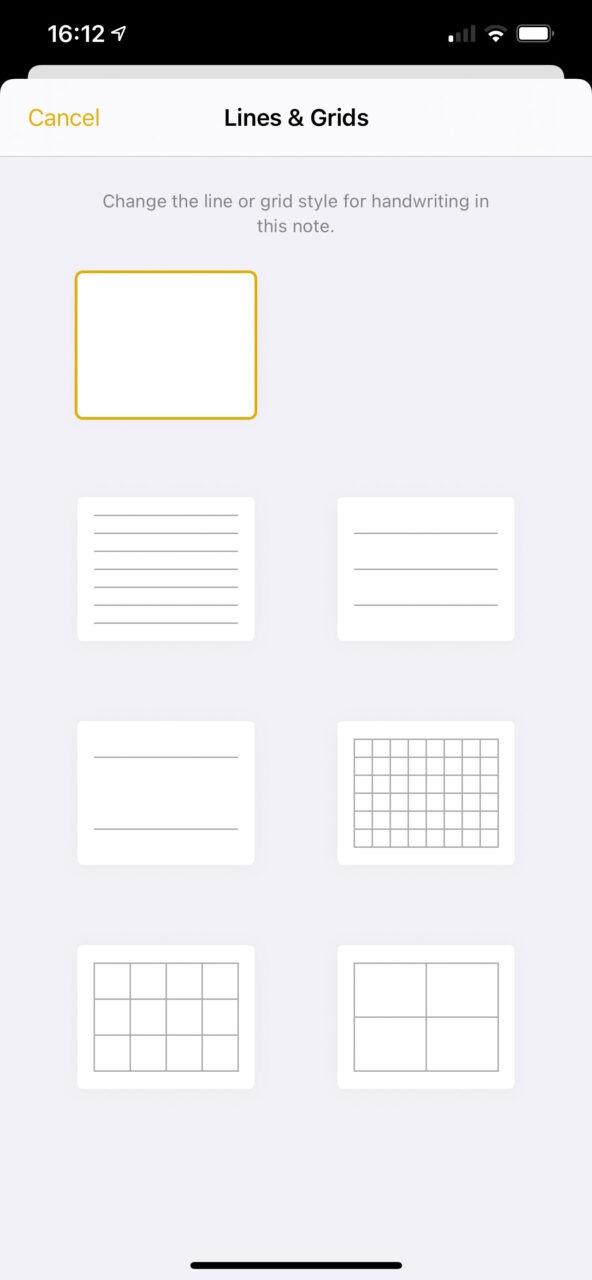
Lines are great for when you are scribbling with the Apple Pencil on the iPad, not so much for the Mac or iPhone. To add lines or grids, tap on the Options icon […] found on the top right corner. Scroll down and choose “Lines & Grids” then choose from a variety of lines and grid options to add to your notes.
3. Creating folders, and organising your notes (adding, moving, deleting)
To add and organise your folders, go back to the Folders view. If accessing this on an iPad, see the sidebar on the left for all the folders. Use the New folder button (bottom left) to add a new folder, give it a name and tap on Done.
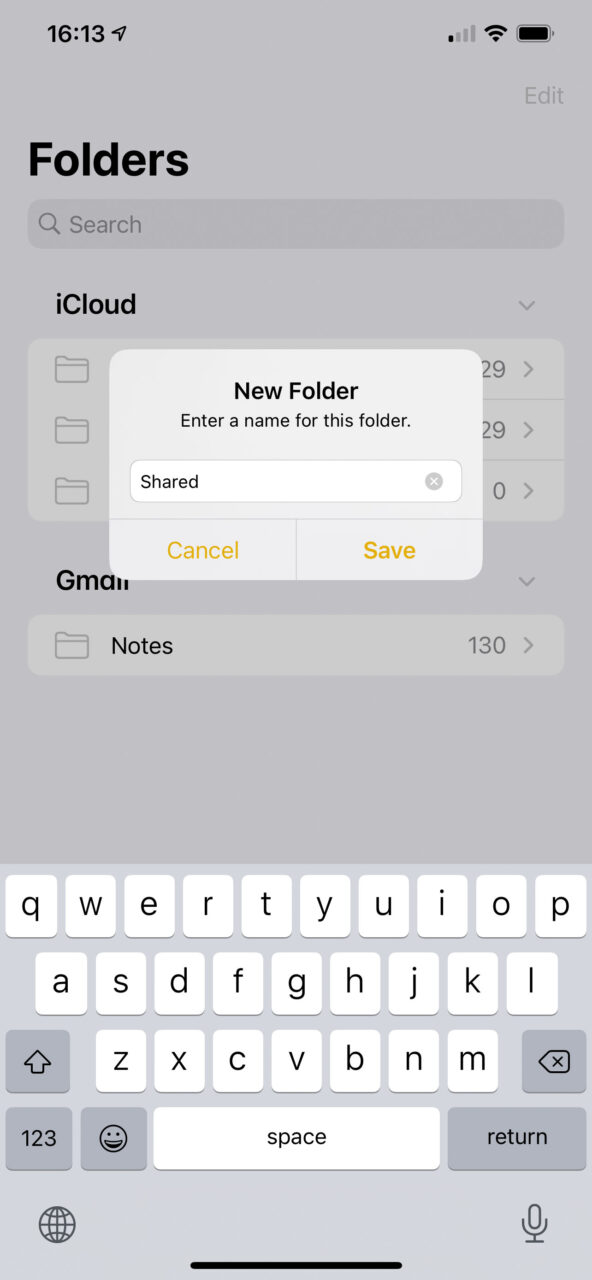
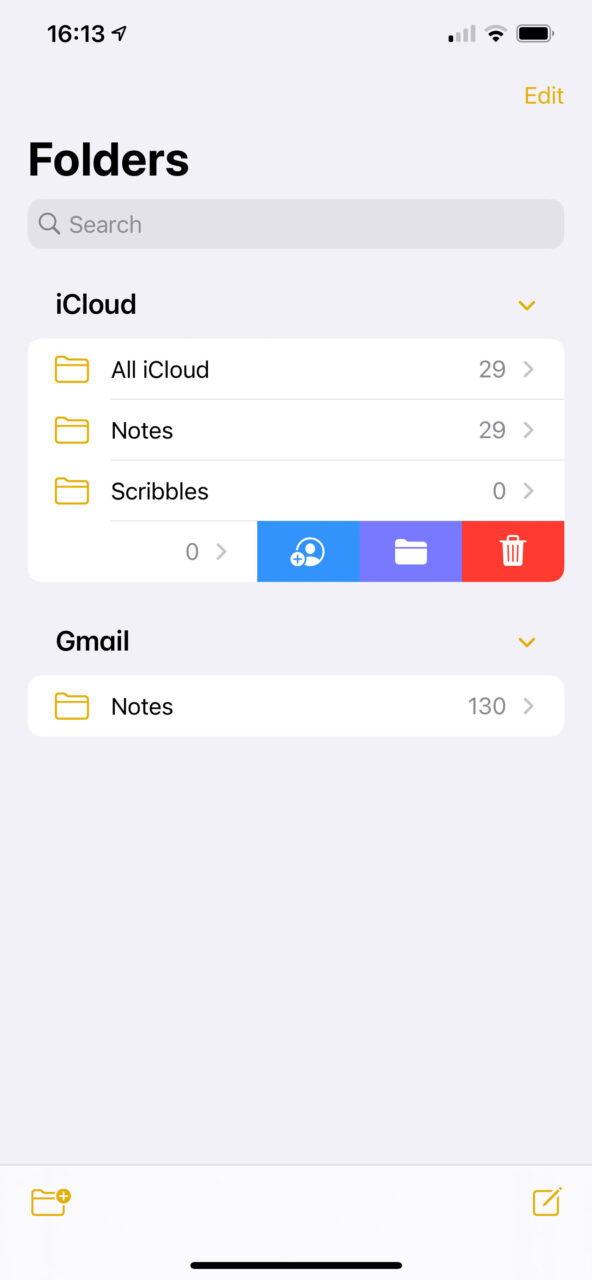
We recommend that you create a Shared folder. You can then either place notes that you share with others in this folder or make the entire folder shared so all notes within will be available to your friend or family. To delete or Share, Move or Delete the folder, swipe left on the folder and choose from the Share (blue), Move (purple) or Delete (red) icons there. See image below.
4. Sharing your notes and good practise
You can share your notes with another Notes user. He or she will also need to use iCloud or have iCloud enabled for Notes. To share, open the notes than tap on the Share icon (top right) next to Options […] you will then be prompted to pick a messaging channel to share it with. Alternatively, you can choose a folder to share. First go to the folder then tap on options […] and choose Share Folder. Note that when sharing a folder, all contents within will be shared.
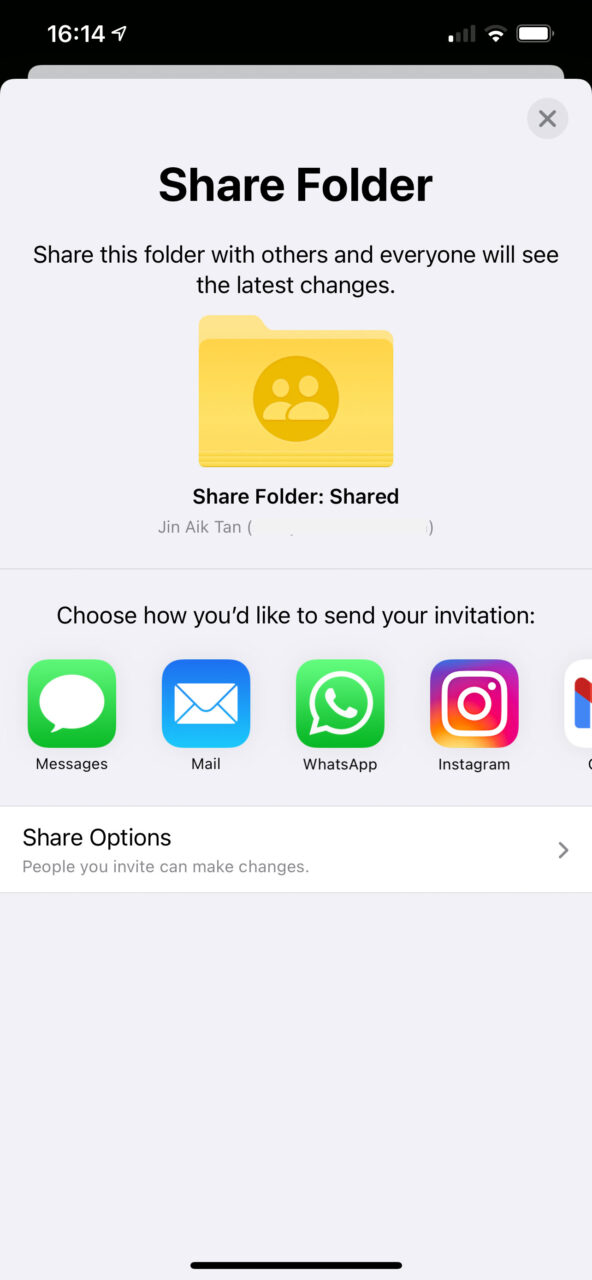
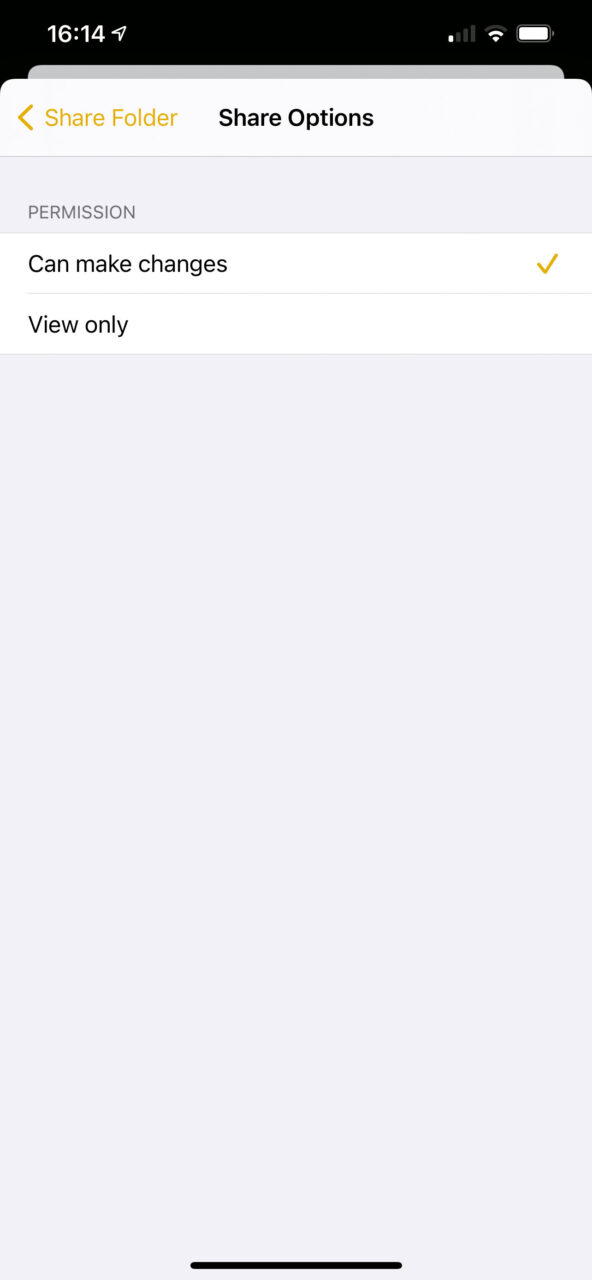
Depending on the apps installed on your device, you can choose Messages, Mail, WhatApp, Instagram, Gmail, WeChat, Messenger, Chrome, Outlook Twitter, Google Drive, Skype and more. Remember also to tap on Share Options and choose if you want to allow them to make changes (Can make changes) or View only.
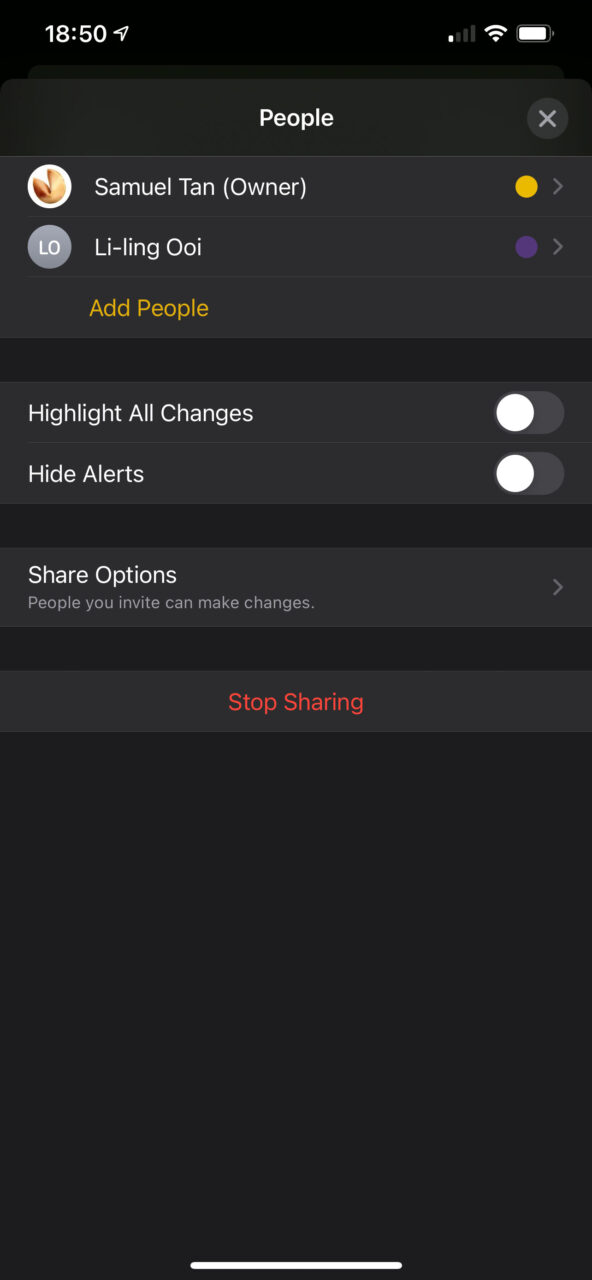
Once a note is shared, you can enable Highlight All Changes (colour coded) and Hide Alerts in the same way you access share options. More on this under Collaboration.
5. Password protect your notes
Some of you might be saving sensitive information on your Notes like passwords and bank details. Who wouldn’t especially when you always have your phone secured with Face ID or pin to. That’s one layer of protection. But for add another layer of protection, consider password protecting your Notes.
iOS: To enable password for Notes on iOS, go to Settings > Notes > Password then add your password and enable Face ID there (if your device supports this).
MacOS: To enable password for Notes on macOS, in Notes app, click on Notes > Preferences in the top bar. From pop-up window click on Set Passwords… button and create your password and hint there.
WARNING: It is important that you remember this password as if you forget it, you won’t be able to access your notes.
6. Scanning Documents to add to your notes
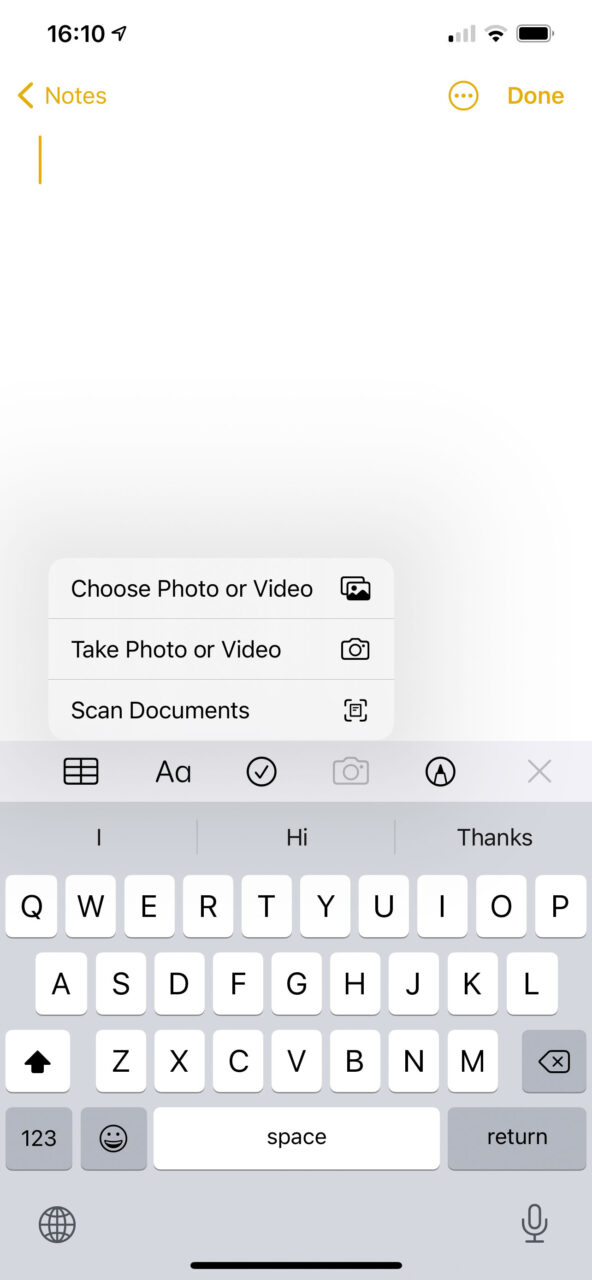
One would never think to use Notes to scan document but here it is, available for free, no additional app needed. In the Notes app on an iPad or iPhone, create a new note then tap on the camera icon. From the pop-up chose Scan Documents, see image below. Align your camera so the entire document is in full view then tap on the shutter button. You can then move the borders to make sure you get the entire document in your snap. These scanned documents even though attached to the notes can still be renamed and emailed or shared as PDFs.
7. Add an existing photo or video or take one for your notes
Using the same camera icon above to call up the pop-up menu choose either to add from album or take fresh photos and videos to attach to Notes. There are many scenario where this could be useful such as for project documentation, photo of items in your collection and activities among others. You can attach more than one and of multiple format be it video, photos and scanned documents into the same notes and still be able to add text and scribbles.
8. Adding a table including manipulating and deleting the table and List
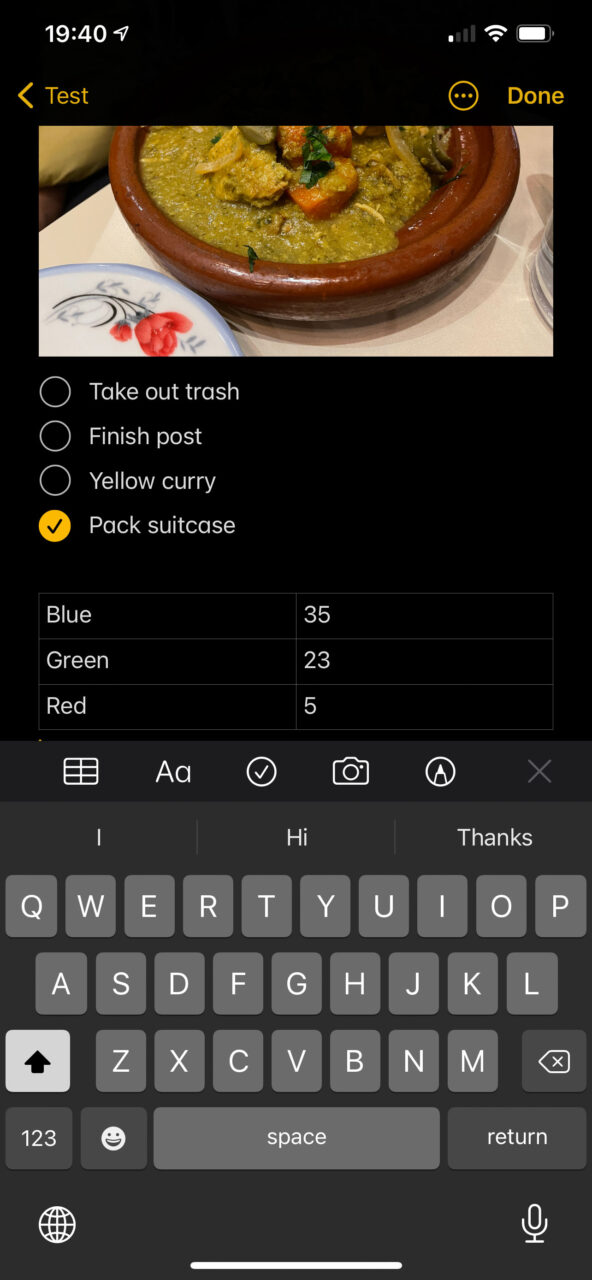
Notes allow you to quickly add a table after which you can add more rows or columns. To do that tap on the little tabs near the column or row for options. You can also select the entire column or row and drag this along to move it. To delete, place your cursor on the far right of the table and press backspace twice to delete.
Then there is the quick checklist function. This and table can be added using the shortcut menu in the top bar or above the virtual keyboard on your iPhone. For checklist, you may be asked to Enable Automatic Sorting. This can be useful to automatically move checked items to the bottom of the list. Again, you can add multiples of these in the same note.
9. Collaborating on notes and folders
We mentioned sharing notes and folders above but what is sharing if not for the ability to collaborate on the notes you shared. Here you can choose to @mentions to draw attention to certain parts of the notes, track changes and check out the activity viewer.
- Use @mentions
- Track changes
- Activity Viewer
Depending on your version, you can use @mention on a shared note to insert collaborator’s name within the body of the text. Type the alias @ symbol, then a pop-up will come on showing you a list of collaborators you can choose. This will flag the section to them by means of an alert.
Track changes and Activity Viewer lets you see the changes that your collaborators have made to the notes that you share with them. To view this, open the note you already shared with others. If you need help with sharing a note, refer to previous section. Now click or tap on the sharing icon [user with + symbol], the same icon for sharing the note from the toolbar to manage the share. From the pop-up, tick the checkboxes “Highlight all changes” and “Hide alerts” accordingly. The colour codes will help you identify who contributed or made changes to the note while the hide alert stops alerting you when someone changes the note.
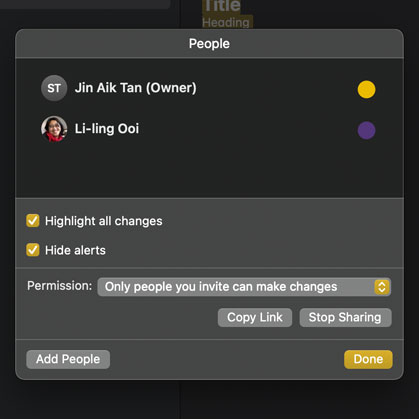
If you don’t see the option above, click View > Show Note Activity.
10. Lock up a note
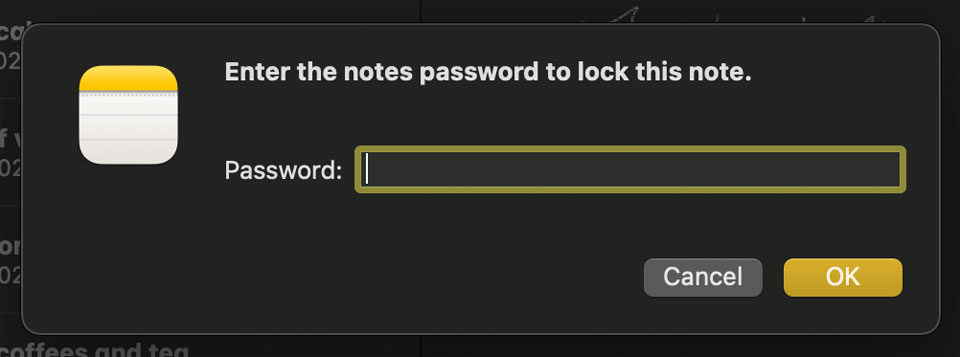
We talked about securing the Notes app with password or FaceID. What if you only need to secure individual notes within the app. You can lock up a note with a password. On macOS, select the note, then in the editor window, click on the padlock icon on the top bar. Choose Lock Note. You will then be asked for password and hint. Once you have done that, a pop-up will notify you that choose Close All Locked Notes from the Lock tool (the same pad lock icon) to hide the contents of your locked notes. Confirm this by clicking OK. This will also lock notes that are inactive.
11. Show All Attachments in Notes
You can browse a list of all the attachments you have included in all the notes. These could be links, videos, photos, PDF of scanned documents and more. On macOS in the Notes app, from the top menu bar click View > Show Attachments Browser. When you are done, just click away from the attachment browser or View > Hide Attachments Browser.

12. Creating subfolders and organising your notes
It will come a point when you get overwhelmed by the sheer number of notes, here is where clearly named subfolders will help. This includes naming them by subject, topic, project, work, home, research or even year and date etc. Whatever works for you.
To create a new folder, hover your pointer over the account (iCloud, Gmail, On My Mac) where you wish to create he folder and right click > New Folder. Alternatively use the [+] New Folder button on the bottom left corner of the app window. Type the name of your folder and press enter. To move notes into this folder, go to the Notes list (second pane from the left) right click on the note > move to > account to move to (iCloud, Gmail, On My Mac). It will even let you drill down to the subfolder you just created.
13. Pin a note
A quick way to pin a note to the top so it doesn’t get lost is use the pin option. on MacOS, right click on the note under the list view, from the pop-up click Pin Note. In iOS, swipe to right to Pin it. This one is easy, so we will leave you to try it out on your own.
14. Storing Notes on a Computer [On My Mac]
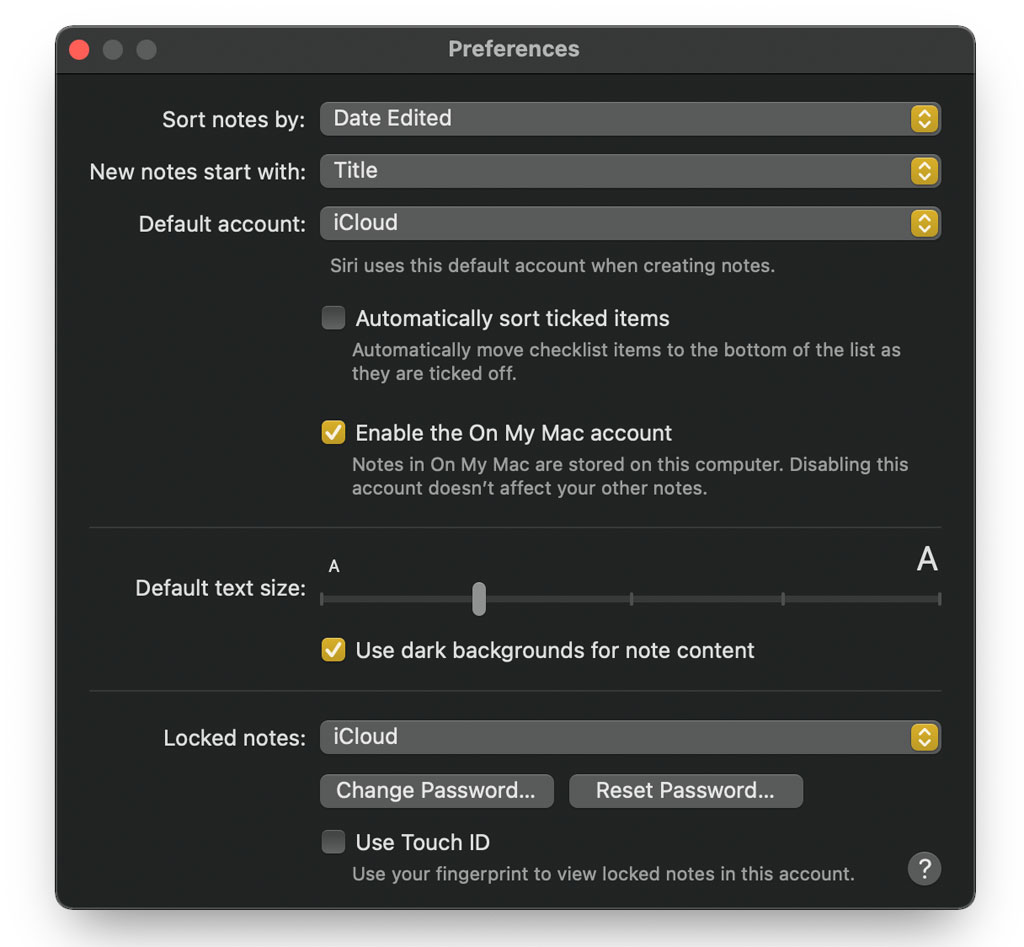
Sometimes you want the notes on the machine you are working only especially on your Mac. In the Notes app, go to Notes > Preferences on the top menu. From the pop-up, tick the checkbox, Enable the On My Mac account. This creates a new branch (or accounts) where you can create and store notes in the left most sidebar where you browse to different accounts e.g. iCloud, Gmail and now On My Mac. If you wish to make this your default Notes storage change it on the same pop-up under Default Account.
15. Tags and Custom Smart Folders , Quick Notes (macOS Monterey)
As you can see, Notes is constantly evolving. Custom Smart Folders are a wonderful way to address the growing number of notes once you start using it more and more. These Custom Smart Folders are populated based on tags. Create a New Folder in the Notes sidebar and choose New Smart Folder. You can then choose the tags you want to include in the smart folder to allow it to self populate.
Next on the list is Quick Notes with macOS Monterey. It represents deep integration of Notes into the operating system itself. You can take snippets of text from a web page in Safari and “Add to Quick Note” or choose to create a new one. You can do the same with photos, videos, messages, links etc in any app. Quick Notes will have its own folder in the Notes app in Monterey, iOS15 and iPadOS15. You can then view and continue editing them there.

You can find out more about Quick Notes for iPadOS in the Apple iPad User Guide.


