How to Write to NTFS Drive on macOS Monterey without using Software
In a mixed environment, MacOS and Windows PC, you often get USB Thumb Drives or External Hard Drive formatted in NTFS file system that you can read but not write on a Mac. Here is a quick and easy hack to enable writing to NTFS Drive without installing any software.
So you have data written on NTFS file system that you need to read on MacOS. Simple enough, just plug it into a free USB port and read away. But what happens when you need to transfer files or write to the NTFS drive. You can’t even find create folder option from your pop-up menu. But do not fret, we have the answer here and it does not require buying additional software to make it work.
Note that this is a temporary solution only, offered by Apple in its experimental stage and is not supported.
Step by Step to Enable Writing to NTFS Drive on MacOS Without Additional Software
Let’s jump right in.
- First plug-in your NTFS formatted external hard drive or thumb drive into a free USB port or dock
- Start Disk Utility. You can find this in Finder > Applications > Utilities or Search “Disk Utility” on Launchpad
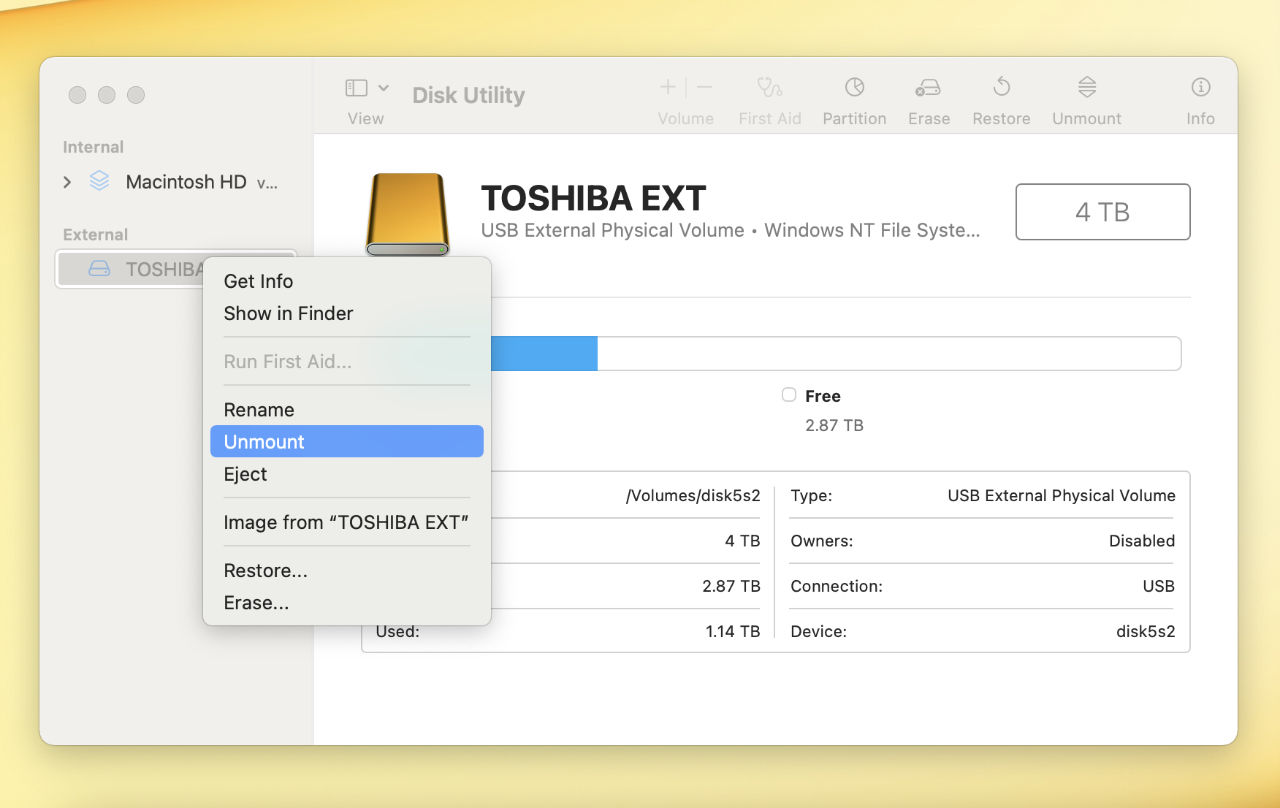
- There you will find your external drive on the left hand column, right click on it and choose Unmount. Take a note of the device label (bottom right corner). In our case “disk5s2” this will be different for you.

Unmount External Drive - Next, open up Terminal. You can find this in Finder > Applications > Utilities or Search “Terminal” on Launchpad.
- Run the following commands, one at a time:
- Diskutil list (note the drive identifier for your NTFS drive from the list)
- sudo mkdir /Volumes/disk5s2 (replace “disk5s2” with the physical drive ID of your drive shown in Disk Utility/Diskutil list, enter password)

Diskutil list and mkdir commands (note physical drive ID will be different for you) - sudo mount -t ntfs -o rw,auto,nobrowse /dev/disk5s2 /Volumes/disk5s2 (replace “disk5s2” with the physical drive ID of your drive shown in Disk Utility/Diskutil list.

Mount Command
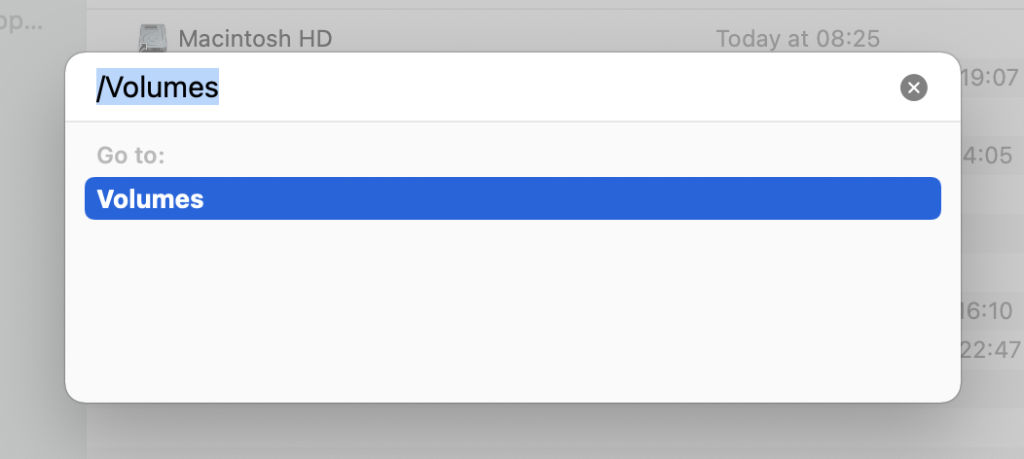
- Open Finder, then Go > Go to Folder… type /Volumes in the search bar then press enter

Go to folder to list Volumes - You can find your writable NTFS drive in the list of local external and network volumes in the next finder window.
It’s that simple. This is a non-destructive way to continue writing to your existing NTFS drive with data. When finished, you can eject the drive in the same window and take it to another system that recognises NTFS file system.
IMPORTANT: The steps recommended above uses Apple’s experimental support for NTFS. Depending on the amount of data you intend to write, this can be a bit buggy at times. You can get away with small amounts of data and folders. Also, if you have to do this often, you may want to consider getting a software that automatically mounts the NTFS drive for you instead of repeating the steps above or consider a jointly accessible file system such as exFAT for external drives.
