Your Ultimate Guide to Working with Raspberry Pi
Raspberry Pi is an affordable and easy way to learn about computing, coding and software. It also does not take a lot of room or power, making it cheap to run too. Then there is the community, documentations and resources surrounding the use of the tiny computer making it an ideal gadget for learning. So, here is your ultimate guide to working with Raspberry Pi.
Computers have been around since the 1930s, but till 1965, they were restricted to working on calculations in an industrial setting, reserved for engineers and mathematicians, They were never really portable. Programma 101 was the first device to conceptualize personal computing, while Xerox was the first to conceptualize GUI-based computing with its Alto, which had a screen, a keyboard, and a mouse. PC (Personal Computer) technology has come a long way since the Alto through path-breaking innovations. Today, we have computers the size of a pack of cards.
Enters Raspberry Pi
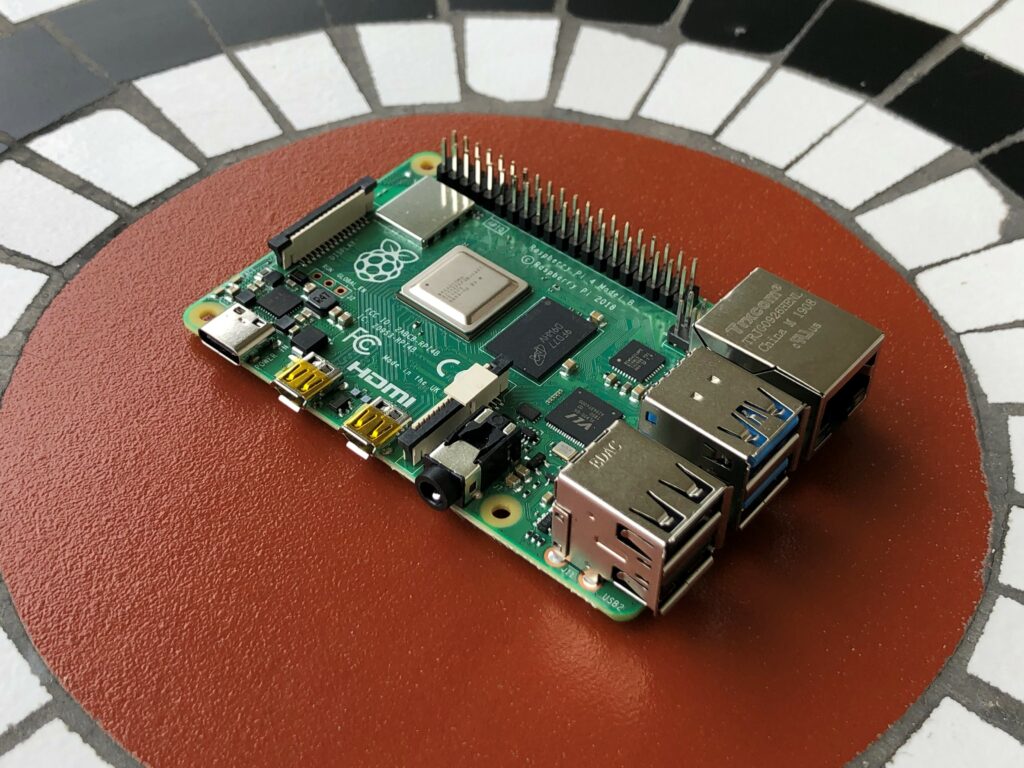
Raspberry Pi is the world’s most popular single-board computer. You just need to power up and connect peripherals and a display unit to start working. Over the years since its launch in 2012, there have been several editions of Raspberry Pi, each with more improvements and customisation features. We will look at how you can utilize this fantastic piece of technology to your advantage and learn some of its usages that are set to change how we have perceived computing to be.
Uses of Raspberry Pi
Raspberry Pi started as a computing device to enable kids to learn about technology. But its uses have grown as its potential was realised in the IoT (Internet of Things) space. Raspberry Pi can run on Linux OS and has several general-purpose I/O pins through which users can control different electronic components.
It supports enhancements like Raspberry Pi camera modules, TV HATs, Sense HAT, and Audio DAC that add to its capabilities and enable users to pursue a plethora of casual and professional-grade projects. Right now, it is the leading choice for developers, DIYers, and hobbyists in developing robots, retro arcade machines, and automation systems for their homes. The possibilities are endless with Raspberry Pi, and thankfully there is a whole community powering this invention.
Components of a Raspberry Pi Module
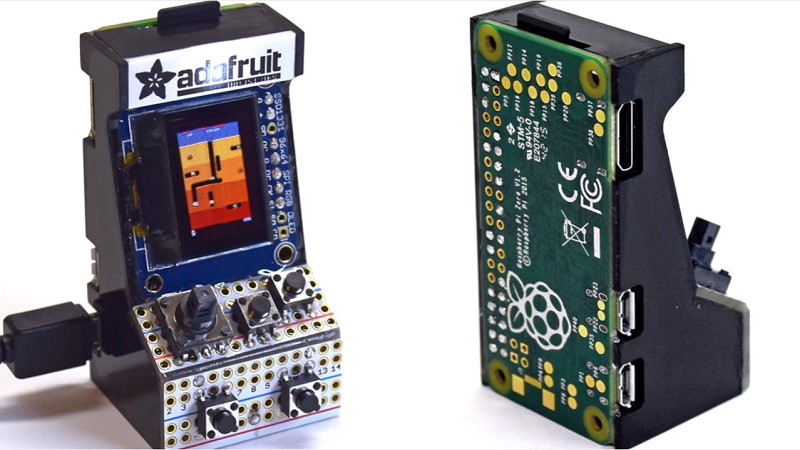
There are more than a dozen of these miniature computers, with the first Pi 1 model released in 2012. When launched, the board had 512MB RAM, a Broadcom-powered system-on-chip (SoC), a 700MHz rated CPU, a 250MHz GPU, and two USB 2.0 ports. A display can be connected to its HDMI 1.3 port, while there is a 3.5mm audio port to connect headphones or speakers. Wired Internet is supported through a LAN port, while there is a micro SD card slot for storage.
Further releases better these specs, with the popular Pi 4 complete with four Cortex A72 cores and 8GB RAM. The GPU is more powerful, with support for two USB 3.0 ports and dual USB 2.0 ports. There is even a USB-C port and support for dual-band in addition to the wired Ethernet and the same microSD card slot for storage. Plus, there are two micro HDMI 2.0 ports for connecting to display units and Bluetooth 5.0 for connecting wireless peripherals.
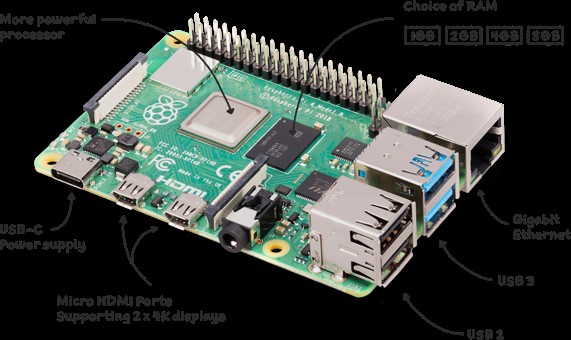
Other models of the Raspberry Pi are Pi 2, 3, Zero, Zero W, and Pico, with different connectivity features still based on a single board layout and GPIO points for developmental purposes. Then there is the Pi 400, a packaged personal computer in a keyboard based on Raspberry Pi 4. Housed in a compact keyboard case, it comes with cutouts to access the ports directly so you just need to hook it and power it up.
How to set up a Raspberry Pi
Setting up the Pi is pretty easy. You would only need a few components to start with for every model sans the Pico.
- You would need a microSD card for storage, preferably a 16GB card, or you can use a bigger storage card if you do not plan on connecting external hard storage drives.
- Next is the power supply, which usually depends on the Pi model. All the models need AC 5V, but the Pi 1, 2, and 3 models need it over their MicroUSB ports or GPIO headers, while Pi 4 needs it through USB-C.
- The Pi needs to be controlled like a PC; hence, you would need a keyboard and mouse unless you have the Pi 400, where the keyboard is a part of the model itself. Then, you just need to add an external mouse.
- A monitor with a compatible input. Pi 4 has a micro HDMI input, while Pi Zero has a mini HDMI input. The right cable adapter and a spare monitor ought to do it.
- An Ethernet cable or internet via Wi-Fi.
You can also go for a headless install where you can use your PC to control your Pi. This way, you use the PC’s existing screen, keyboard, and mouse and save considerably on standalone peripherals. This is especially useful for simple projects like light or sensory work and motor control where display output isn’t necessary.
Installing Raspberry Pi OS on the SD Card
With the essentials gathered, it’s time to install the Pi OS called Raspbian, and the Raspberry Pi Imager works best in this process. You can also run Windows 10 on the Pi 3 Model B but Linux-based Pi OS is best optimized for Pi modules. You should install the OS on an SD card that is class 10 or above, as it would ensure a hiccup-free boot. Alternatively, the OS can be installed on external SSD drives too.
Steps to install the Raspberry Pi OS
First, download the Raspberry Pi Imager from the Pi’s original webpage and insert the microSD card into your computer. The Imager application is compatible with multiple operating systems, and it both downloads and installs a bootable Pi OS on desired locations. You can also download and burn the Pi OS image using third-party applications like Power ISO or Daemon Tools.
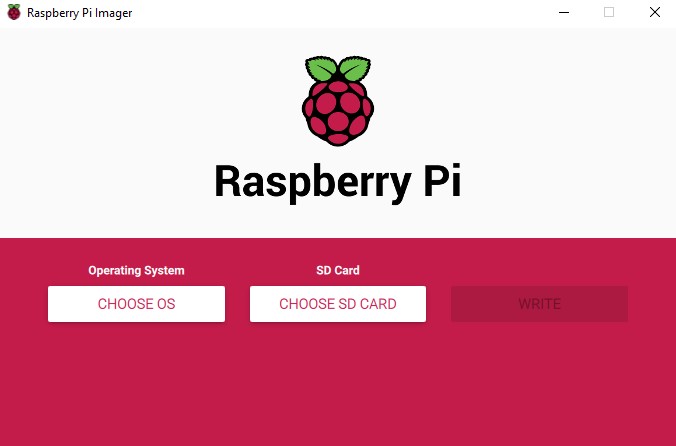
With the Imager app installed, choose the OS and location. Pick one of the OS from the drop-down list, but we advise you to choose the 32-bit version. Next, choose the SD card and click on Write.
Once the installation is done, insert the SD card into the Raspberry Pi’s card slot and power the card up.
On the first boot, you get a dialogue box welcoming you to Raspberry Pi. Next, you need to choose your location, language, and time zone and proceed to change the Username and Password. You may change it or leave the fields blank if you want the username to remain “pi” and the password as “raspberry.”
If you are working with a Wi-Fi-enabled Pi module, you would be prompted to connect to the network, and if you are on Ethernet, now would be a good time to connect the LAN cable. You would need Internet in the next step.
Next, you would be prompted to Update the Software; we advise you to click Next and begin the update process though you have the option to Skip it.
With updates downloaded and installed, the screen would prompt for a reboot. Click next, and you are done. Your Raspberry Pi will reboot and be ready to start working.
Ready to start on the face detection module? Let’s change some settings first. How about a better display resolution?
Click on the Pi icon and then go to Preferences. Click on the Screen Configuration icon. Right-click on the box that says HDMI 1 and choose your desired resolution.
Full HD is the highest available, but even 720p is manageable depending on the project you would be working on. Remember to click the check box above HDMI 1, and your chosen resolution should be applied.
Work on Projects with Raspberry Pi Add-Ons
The Pi boards have allowed users with technical knowledge to cut loose and dive deep with their creativity. If you are looking to create your own home alarm system or a facial recognition-enabled door that opens automatically for known faces, you would need some more add-ons. HAT is Hardware Attached on Top or simply an add-on circuit board that adds features and functionality to Pi. HATs save you the horror of soldering wires on that miniature circuit board by plugging themselves into the GPIO pins, opening doors for development. These components can be programmed to work as per the developer’s liking. Let us look at some of them here.
1. Camera Module
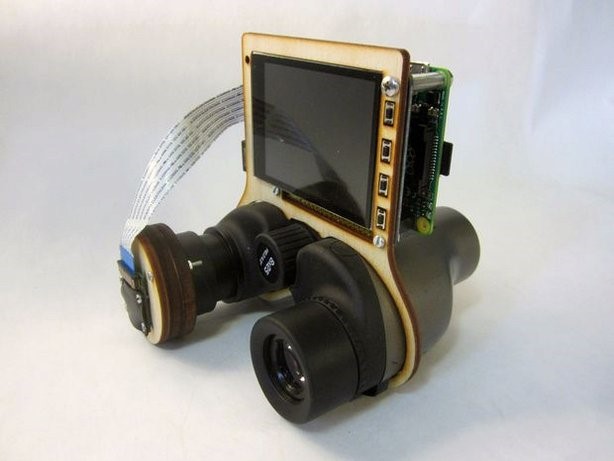
The Pi camera module uses a camera serial interface port that is compatible with almost every Pi model. The module uses a ribbon wire and comes with an 8MP Sony sensor. There is a visible light sensor and infrared sensor version that can be used on various projects with different utilities. The IR version works in the dark and can be used on a Pi-powered night CCTV.
2. Unicorn HAT
The Unicorn HAT is an 8×8 led board that can be used for status displays. Gadgets like motherboard error detectors, homemade temperature monitors, USB power monitors, or DIY digital clocks need small displays, and the Unicorn HAT can come in handy with its display.
3. TV HAT
Want to create a personal TV for your room? All you need is a TV aerial, an internet connection, a display, and a computer initially for the setup. With this cheap add-on, you can receive digital DVB-T2 TV signals and stream them over the display device.
4. Audio Module
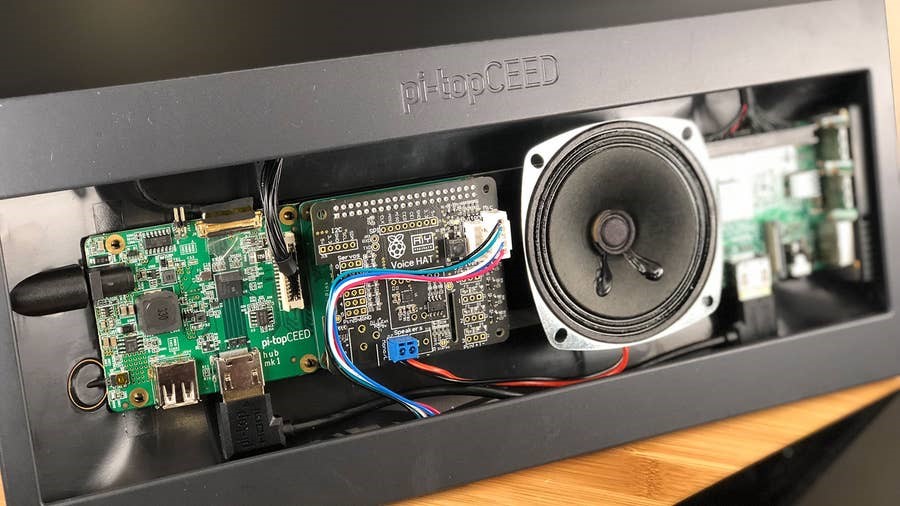
Raspberry Pi supports multiple audio modules like the IQaudio DigiAMP+, IQaudio DAC+, and IQaudio DAC Pro. With the DigiAMP+, you can make your own Raspberry Pi-powered stereo speaker systems. This small add-on can deliver 2×35 watts per channel. The DAC+ supports 24-bit 192 kHz digital audio and delivers analog audio to a pair of phono connectors. The DAC Pro supports high-fidelity audio output.
5. Motor Controlling Module
The MotoZero is a controller board for motors and is a great add-on to address the cravings of budding mechanical engineers. The module supports up to four motors and can be used to build miniature robots that can fetch your soda or turn on lights to start with. On a higher level, the MotoZero board can also be used to design voice-powered room cleaning machines.
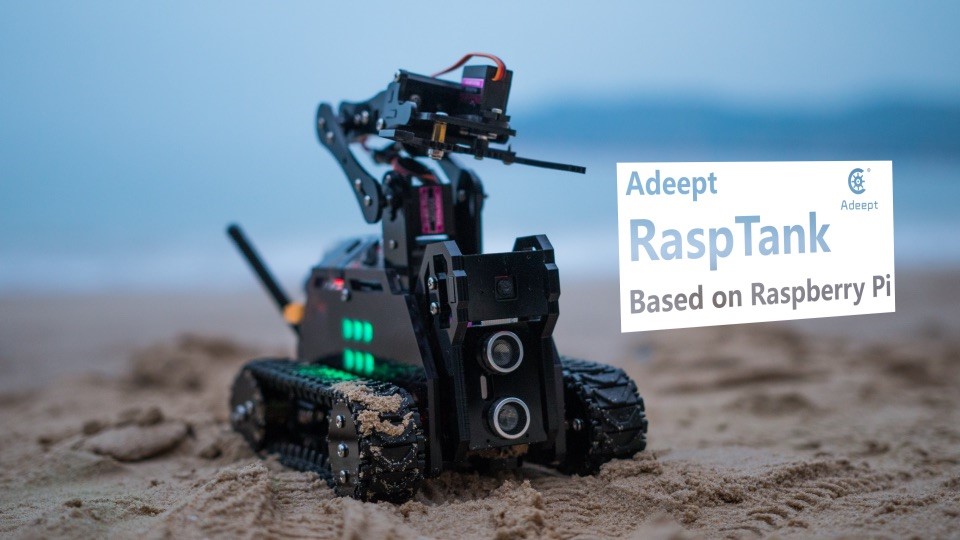
You can find out more about RaspTank on Adeept and MotoZero over at The PiHut.
More Add-Ons and Information
These are just a handful of add-ons listed that are easy for everyone to understand and work with. There are third-party companies dedicated to making Pi hardware that can be used for more advanced developments like gesture recognition. However, it would be worthwhile knowing that every development needs basic to advanced coding knowledge, and developers have to write codes to make the connected enhancements work to their liking. Complete guides for every add-on are available on the Raspberry Pi website for help. You can also refer to different Raspberry Pi forums and groups on the internet for use. With a massive community behind the development of Pi, even handholding is available in some cases.
Important Raspberry Pi Commands
Raspberry Pi works on a Debian-based Linux OS called Raspbian. Like with most Linux releases, several regular tasks like file system navigation, application installation, file editing, and performance monitoring can be done better through a command line interface than the graphical user interface.
Here are some of the things that every Raspberry Pi user should know.
1. Opening a Command Prompt Terminal
There is a small terminal icon right at the top edge, or you can click Ctrl + Alt + T to launch the command prompt.
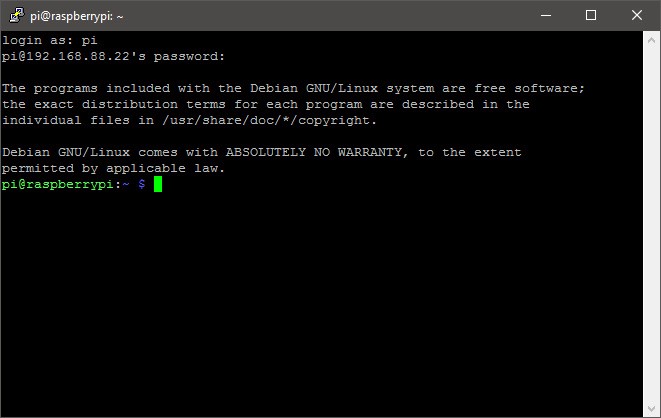
When you launch the command prompt, you might be greeted with pi@raspberrypi:~$, which implies the user pi has logged into a machine called raspberrypi. The $ is the type of permission that, in this case, is editing any file or folder in the home directory. For making system-wide changes or changes to the underlying file systems, one must have ‘root’ permissions or assume the role of a Super User temporarily.
2. Super User Do or sudo
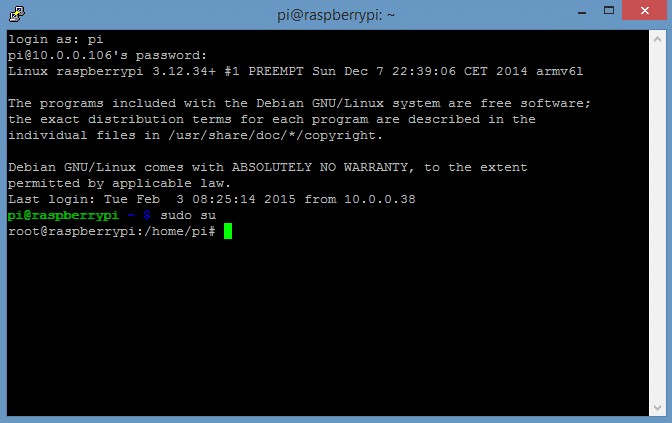
Prefacing any command with sudo, you can obtain temporary rights to perform complex operations, the permissions of which are not automatically granted in any Linux-based OS. For example, to upgrade the OS, you must type sudo apt upgrade.
3. Configuring Pi
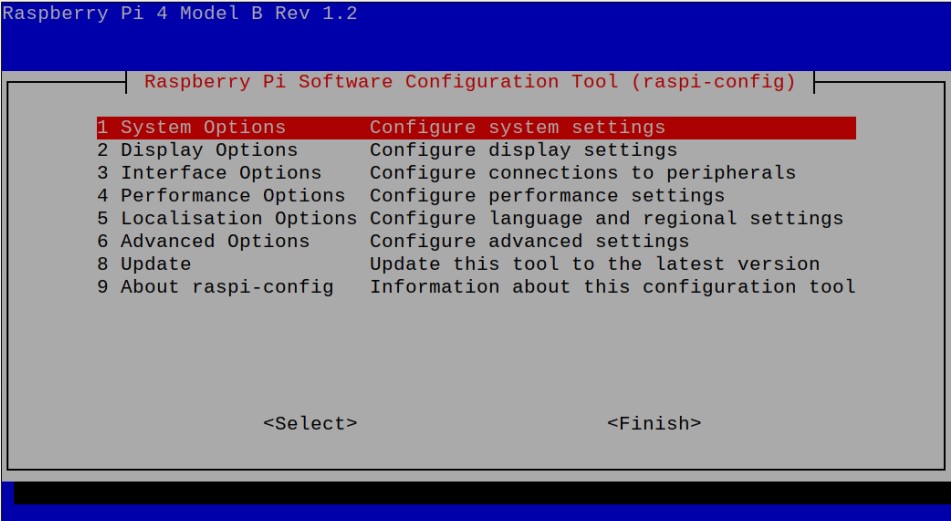
Changing passwords, overclocking the Pi, or enabling VNC can be quickly done through the configuration tool. The command to launch the tool is sudo raspi-config.
4. Miscellaneous commands
Other commands that you might need are as listed below:
- Path to the current directory pwd
- List files in the current directory ls
- See hidden files and directories Is -Iha
- Change directory cd
- Move to a different directory (say Downloads) from the current directory cd Downloads
- Go back to the previous directory cd –
- Go to the home directory cd ~
- Display system processes htop
- Display free and used RAM free -m
- Move a file to a different directory (file name XYZ to Downloads) mv XYZ Downloads/
- Rename a file (XYZ to XYZ1) mv XYZ XYZ1
- Delete a file rm XYZ
- Copy a file (XYZ to Pictures) cp XYZ Pictures/
- Install the application (VLC Player) sudo apt install vlc
Conclusion
Raspberry Pi has opened the computing space to almost everyone who has a knack for development with computer and technology. Pi costs just a fraction of actual computers and allows enthusiasts to develop miniature working models of projects made for commercial use. These single-board silicon promote inquisitiveness, love for technology, and a desire to learn in children from a young age. Raspberry Pi. We hope this article will generate enough enthusiasm in you and get you started on your first Raspberry Pi project.


