Start Your Own Virtual Classroom in Under 2 Minutes with Google Classroom
Your school, college or university may already subscribe to G Suite for Education. If that is the case, head over to Google Classroom and start your first virtual class now using the steps below. However, even if your school do not use G Suite for Education, you can still create your virtual classroom using your personal gmail account.

What We Cover
In this article, we look at the complete teaching cycle using Google Classroom. Here is what we will cover; information and steps below:
- What is Google Classroom?
- The Four Major Components of Google Classroom
- A: Start Your First Virtual Classroom Now
- B: Invite Students & Teachers to Your Classroom
- C: Share Resources on Stream
- D: Create an Assignment as Classwork
- E: Grade Work and Return Submission
- Google Classroom Settings
What is Google Classroom?
Google Classroom at https://classroom.google.com/ is a free online learning platform developed by the good people at Google for schools.
It is a virtual learning environment (VLE) or learning management system (LMS) that lets teachers create virtual classrooms, create and distribute classwork and share announcements. Students can use class code to enrol or be invited to enrol in these online classes.
Put simply, it is a platform aimed at providing a paperless and simplified way of teaching and learning with powerful tools that lets teachers create, distribute and grade assignments.
The Four Major Components of Google Classroom
The user-friendly and easy to apply system consisting of four major areas:
- Stream: the front page of the classroom that works like Facebook pages. It displays all posts in chronological order. You can post or schedule announcements, assignments or questions. It even allows you to reuse your previous post. To make it easier to follow your Stream, add topics to your posts. This will allow your students to filter the Stream and see related posts quickly. Another useful feature is to move a post to the top to highlight it.
- Classwork: where teachers can create assignments and questions, use topics to organise classwork into modules or units and manage this in order that you wish for the students to see it. It also ties in with Google Calendar and Class Drive folder to set deadlines and share files.
- People: here is where teachers can enrol students by inviting them to the classroom using their email addresses, add support staff or other teachers also by adding their email addresses and track individual student progress. The latter is only available once a student has been added. You can see their assignments, grades and missing work by clicking on a student’s name under the Students list. Plus, you can also send them an email to follow up.
- Grades: last but not least, the grades section is where you find the grades for assignments or questions created in the stream or under classwork.
A: Start Your First Virtual Classroom Now
Time to complete: under 2 minutes
- Login to Google Classroom. If your school uses G Suite for Education, login with your schools google account e.g. firstname.lastname@my-school.com
- Click the + icon on the top right corner and choose Create class
- Choose if you are using Google Classroom with G Suite for Education accounts* or with personal accounts. Tick the checkbox if you are not using Classroom at a school with students. Then click Continue.
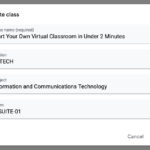
- Complete Class name, Section, Subject and Room. The first field is required, the rest are optional.
- You have successfully completed the creation of your first classroom.
B: Invite Students and Teachers to Your Classroom
Time to complete: depends on the number of students and/or teachers
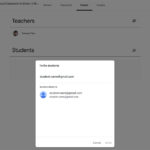
Once you have created your Google Classroom, it’s time to invite students and/or teachers (support staff and replacement teachers) to your Classroom. There are two ways to do this. You can manually invite them or send them the class code, see step and images below.
- Invite students or teachers to your class using (+) Add students or (+) Add teachers on the People page or give students the class code to join.
Image Gallery for steps A and B.
G Suite for Education
Your school or district may already use G Suite for Education. If so, sign-in with your G Suite for Education account, not your personal gmail account. Then, create your first virtual classroom. Once you have created your virtual classroom, add students via the People tab using the search function. If however, you do not have G Suite for Education in your school and still want to create Google Classroom, Tick the check box in step 3. In this mode of operation, your students will need to login with their personal gmail account. This mode of access is only for young persons and adult learners.
C: Share Resources on the Stream (default page)
Time to complete: 1 minutes
You can share resources on the stream or place an announcements there. Students can respond by leaving a reply or comment. The Stream is like your timeline on social media platforms like Facebook or Twitter. Use the steps below to add your first resource.
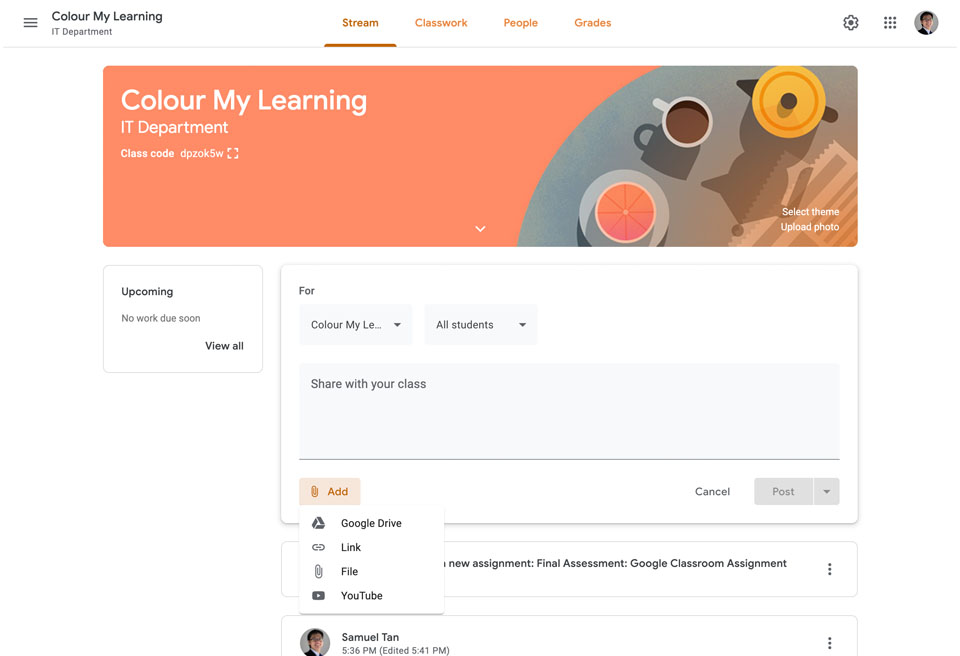
- Go to Stream page
- Click on the Share something with your class… link
- Type what you wish to share and Add Google Drive, Link, File or YouTube
- Choose to Post, Schedule or Save draft to finish.
What is the Stream Good For
The stream is great for sharing Google Drive, Links to resources such as website and PDF documents, upload resources in the form of files like slide presentations, word documents or spreadsheets. Additionally, it can also be used to share YouTube video by searching for the video or pasting the links in the search bar then clicking on the video you wish to share.
D. Create an Assignment as Classwork
Time to complete: 2-5 minutes
This step requires you to be familiar with Google Docs. The online document editor is not very different from Microsoft Word. Follow the steps below to create a new assignment under Classwork. For the purpose of this tutorial, our assignment is to answer some basic questions by typing directly into the online document and when ready, hand-in the assignment for grading.
- Login to Google Classroom and go to the class where you wish to add the assignment.
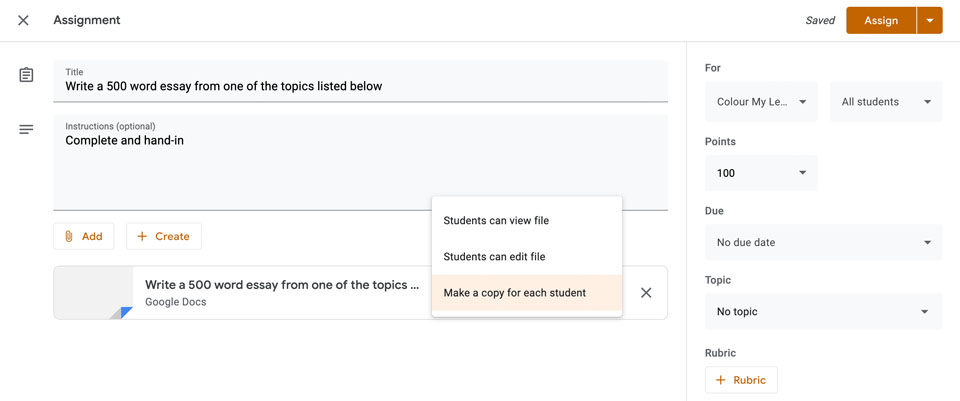
- Click Classwork tab then click the + Create button and choose Assignment from the drop down menu (see image D1 below)
- In the Assignment window, complete the Title, Instruction and click + Create then choose Docs from drop down menu. You can also choose Docs, Slides, Sheets, Drawings and Forms from the list to create the relevant document directly online.
- A new tab will open presenting you with a new Google Docs, update the Untitled document field, complete the body e.g. “Write a 500 word essay from one of the topics listed below”
- Change the the allocated Points, set a Due Date and add a Topic label in the right side bar.
- When you are ready, look for All changes saved in Drive status. This indicates that the document is saved. Then, close the tab and return to previous tab.
- In the previous tab, next to the Google Docs you have just created, click on Students can view file and change this to Make a copy for each student (see image D2 below). This will allow them to edit and submit or hand-in the document individually so you can grade them.
- Finish by clicking on Assign button on the top right corner and confirm the Assignment.

Rubric for Grading and Feedback and Other Assignments
You can also use Rubric to grade the assignment and offer feedback but it gets a little more involved. Create a new Rubric or Reuse existing one to add to your the assignment so you can grade based on that Rubric in the next stage.
From D1 screenshot above, you can also choose to create the following:
- Assignment
- Quiz assignment
- Questions
- Material
- Reuse post
- or Topic
The last option, Topic is a section header. Once created, you can then drag and drop the assignments you have created on the Classwork page under different Topic headings, see image D3 below.

E: Grade The Assignment
Time to complete: 2-5 minutes
Once your students have submitted their assignment, you can view and grade them. You do this in the Grades page.
- Go to the Grades page
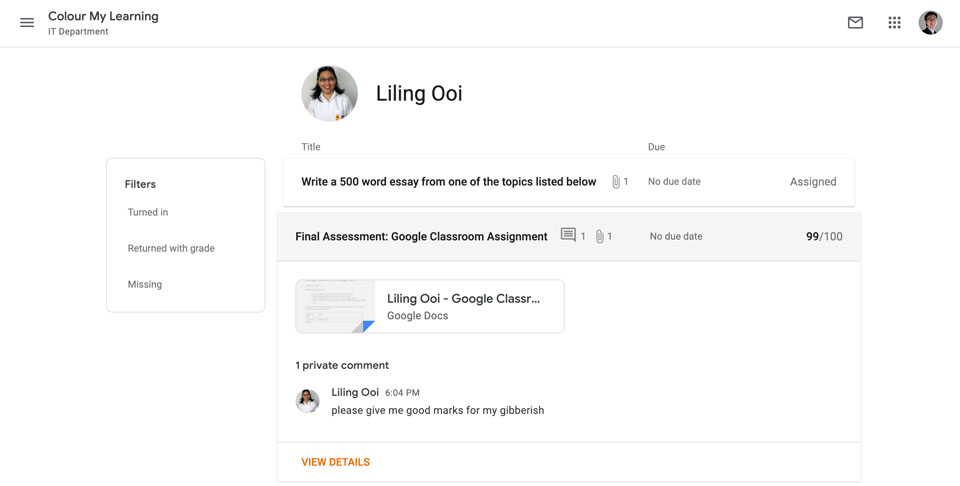
- Click on the name of the student to see their submissions
- Here you can click on the Assignment document to open and read their submission, see image E1 below.
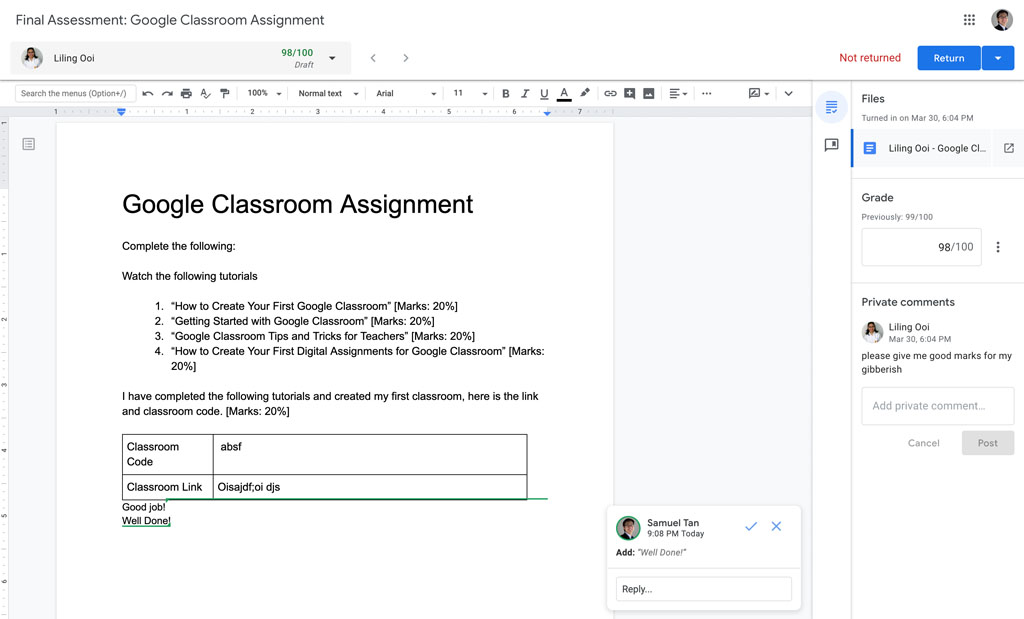
- This again opens the Google Docs assignment submission in a new tab, type corrections or comments directly into the body of the document. This will be highlighted to the student as suggestions.
- Use the right side bar to add messages, choose from comment bank to leave your feedback and add grade.
- Click Return button on the top right corner to return the submission when ready, see image E2 below. Then confirm return and grade. You can now close the Google Docs tab and go back to the previous tab.
You can also grade multiple students in the Grades page by entering their grades directly into each row.
Google Classroom Settings
Finally, to fine tune your classroom, visit the settings page by clicking on the gear icon on the top right of the page. Here you can manage the class details, class code, Stream permissions, the Classwork view, the way Grades are calculated and Grade Categories. See screenshot below.


