How to Remote Desktop from a MacOS to Another MacOS for Free
Here’s what you need to remote desktop from a MacOS computer to another MacOS computer for free. No need for plugins, web extensions, software or apps. And, we are here to tell you that it is all there, the remote desktop server and client already built-in.
It is not the easiest to find but Apple has remote management built into the system. Apple uses Virtual Network Computing (VNC), a graphical desktop desktop sharing system, For this to work you have to find the Remote Management settings, on the server end to enable it and the Screen Sharing remote desktop viewer app, on the client end.
Remote Desktop for Mac
Our first go to is to search for remote desktop app in the App Store. There, you will be presented with two top options, the Microsoft Remote Desktop (free) and Apple Remote Desktop (fee based). If you search Google, for how to remote desktop, you are also likely to get the same results plus other third party apps.
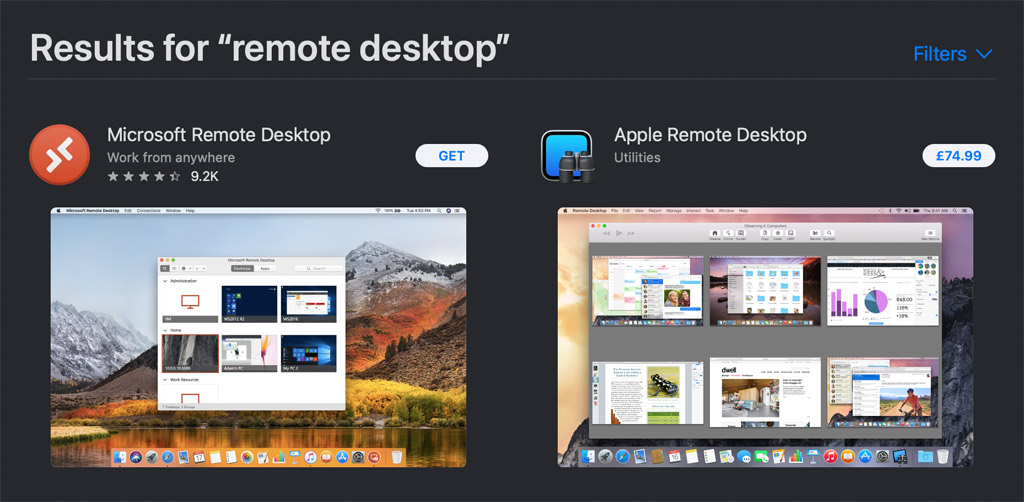
The free Microsoft Remote Desktop is for remote access to a Windows PC and Server. Apple Remote Desktop on the other hand is an enterprise level tool to manage the Mac computers on your network. It goes beyond observing and controlling as it allows you to provide real time help, distribute software, create hardware and software inventory and create routine management tasks.
So, the first option, Microsoft Remote Desktop is a none starter seeing we are looking to control another Mac and not a PC while the second option from Apple isn’t exactly free. In fact, it is quite costly for the occasional user. So, here is how you can control a MacOS desktop from another MacOS without downloading any app or paying for one.
On the Target Machine (server)
Note that the screen shot may look different depending on the MacOS version you are on. These are taken on MacOS Big Sur.
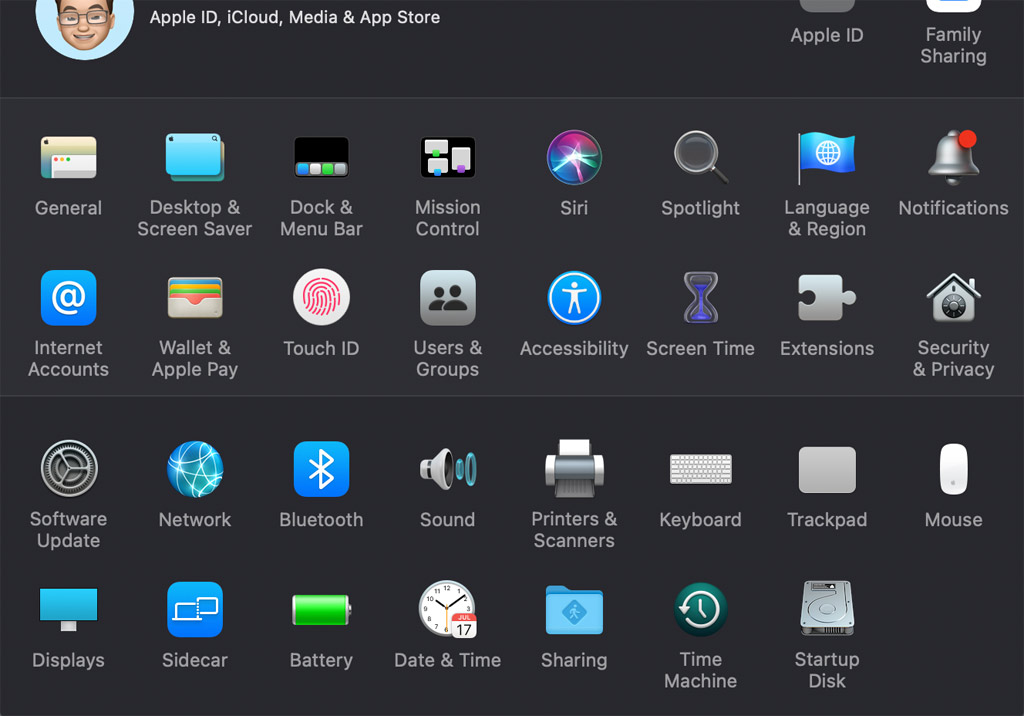
- Click on the Apple icon on the top left corner and click on System Preferences
- Click on Sharing (above)
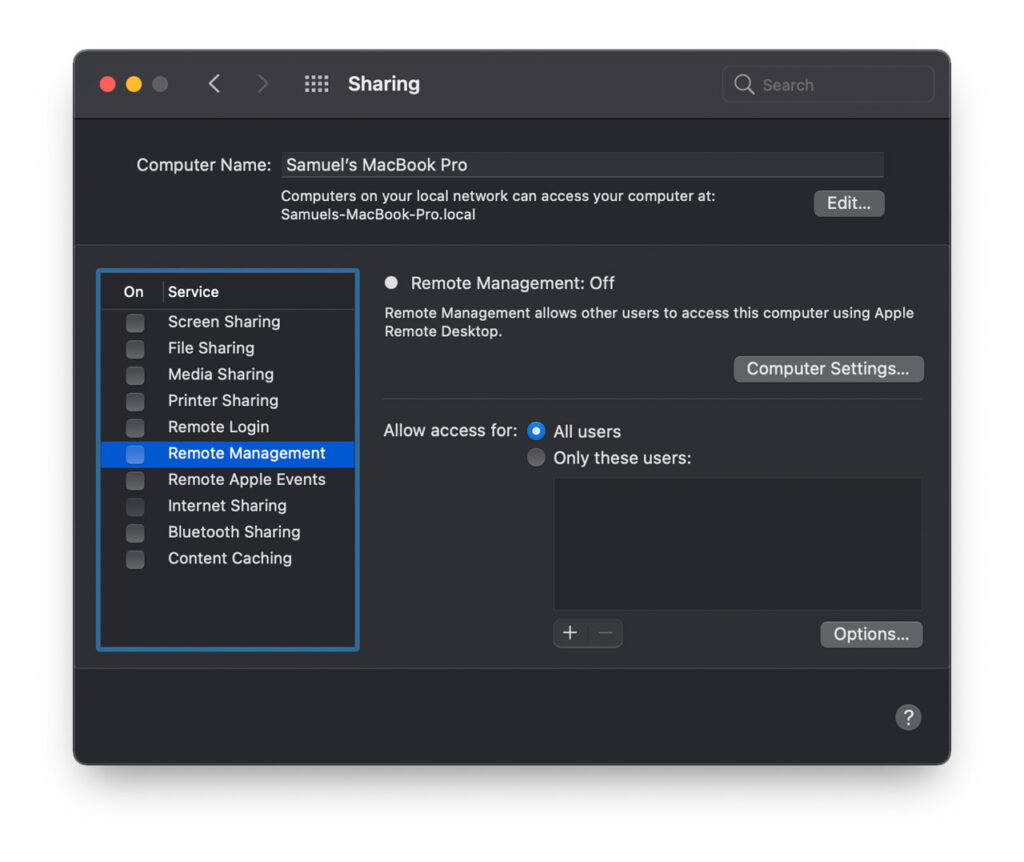
- On the left sidebar under Service, tick the checkbox Remote Management (below)
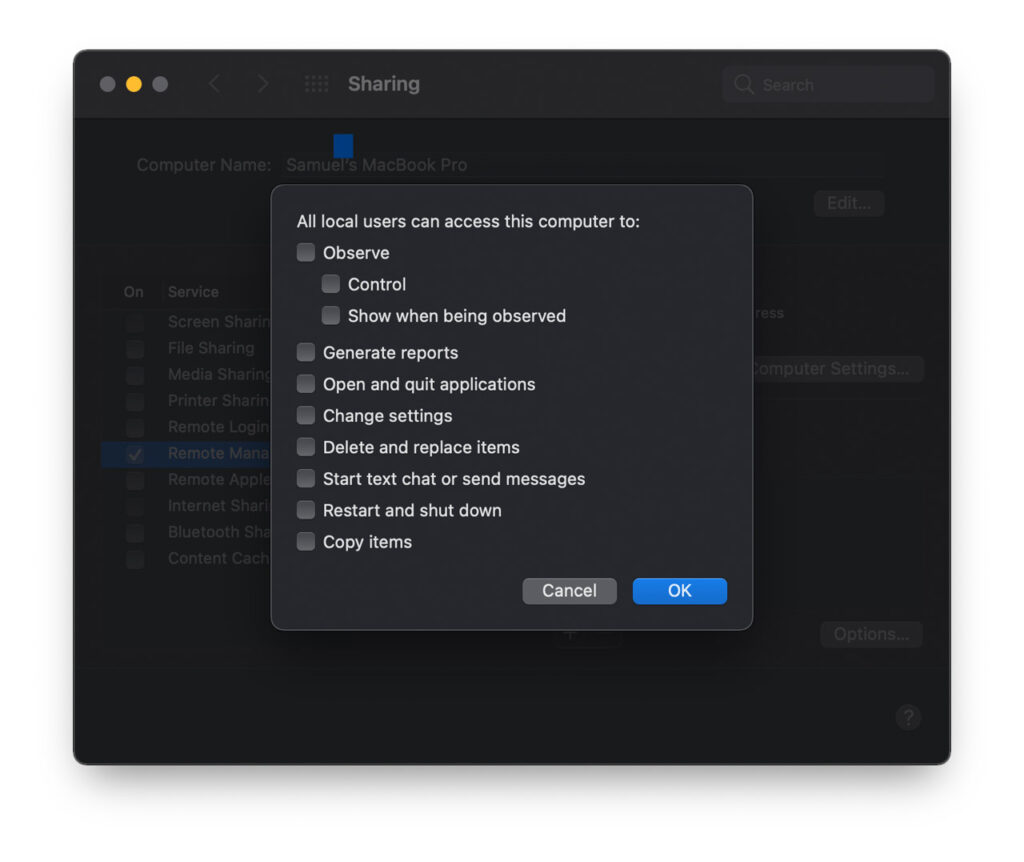
- A pop-up will appear with access permission checklist (below), pick what you wish to allow then click OK.
- If you are not sure, start with Observe and Control. You can come back again to change this again using the Options… button.
To Secure Remote Access
Use the following steps to secure the connection and restrict the user to only specific local account. Change from All users to Only these users then click on + button to add from a list of local user. Here, you will have to set Access Permission again. The remote viewer will need this credential to access the machine.
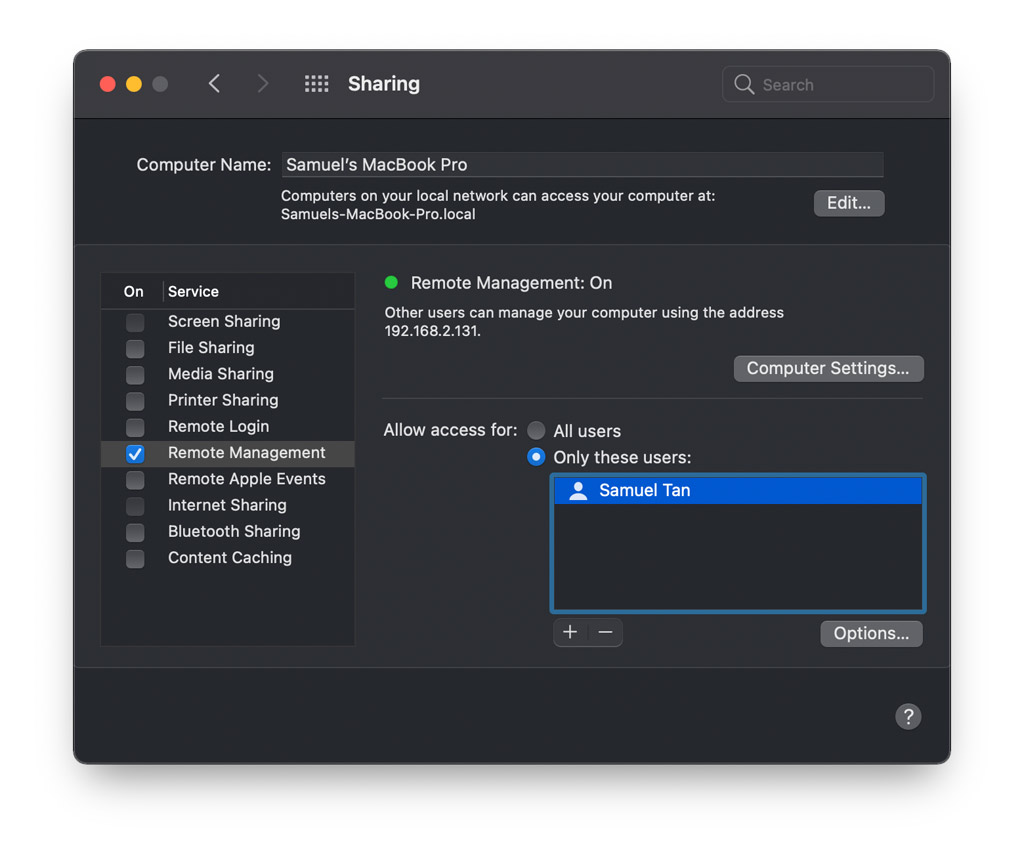
IMPORTANT: Note the IP address (192.168.x.x) in the Sharing window above. We will need this for the client machine below. You will know that the Remote Management service is running when you see a green status indicator.
On the Observer or Controller Machine (client)
There are two ways to start a remote desktop session from one MacOS to another MacOS, both use the same application.
1. Using the Safari browser
On a remote MacOS desktop, start Safari, Chrome or any browser and enter the following vnc://Your.IP.Address.Here [replace with IP address above].
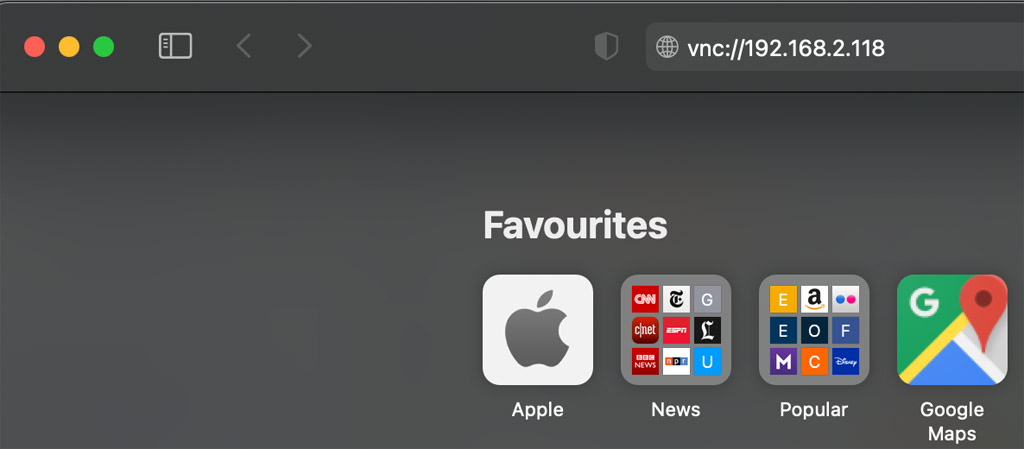
Next, click on Allow in the pop-up to allow the page to open Screen Sharing app.

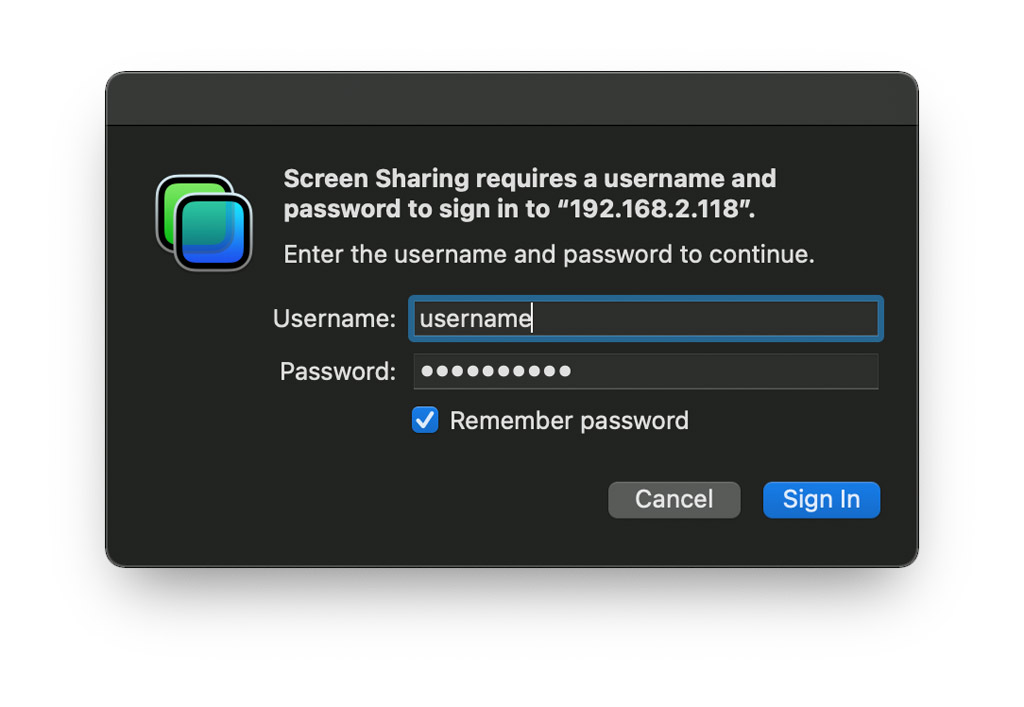
This is followed by a login screen where you enter the username and password for the local account in the target machine. The machine that you wish to control then click sign-in button.
You will then be transported into the Screen Sharing app. There, depending on your access permissions, you can choose to observe, control, scale the display and share clipboard from the buttons on the top right corner. To increase the quality of the graphical feed of your session, click View > Full Quality from Adaptive Quality. Other options are available under Screen Sharing > Preferences… from the top tool bar.
2. Using the App Itself
Here is the catch, the Screen Sharing app is not readily available from the Applications folder or the Launchpad. You have to find it using Finder. In Finder, click on your computer (under Locations) in the left sidebar, and browse tot he following location
“/System/Library/CoreServices/” or “/System/Library/CoreServices/Applications”
On Big Sur, Screen Sharing is located in the latter location in the Applications subfolder inside CoreServices. Double click on this to open.
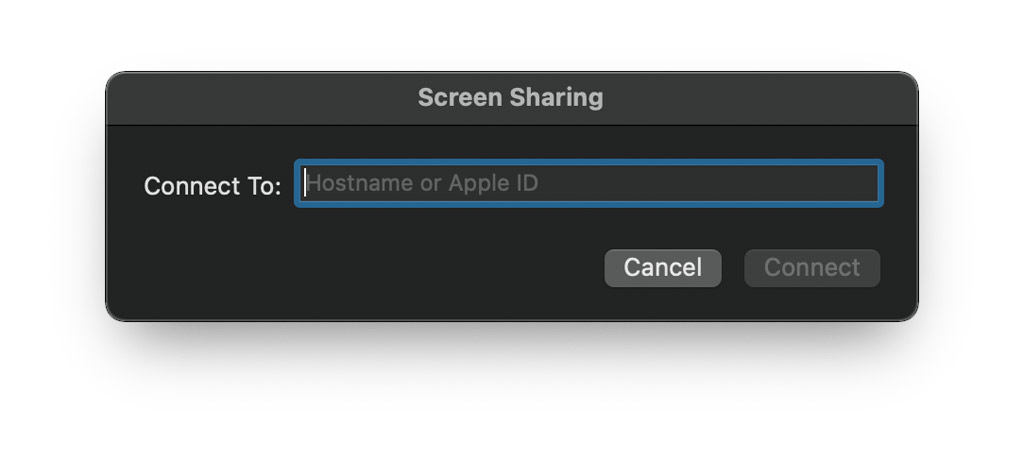
Enter the IP address of the machine on your local network that you wish to observe or control then click Connect.
You can access recently connected computer from the top Screen Sharing tool bar via Connection > Open Recent > Machine Name.
Again, login with username and password.
Limitations
There are some limitations however, like this method of remote access only works on the same network and you can’t transfer files between the windows. To access a MacOS desktop remotely, use either TeamViewer or LogMeIn, both of which are available free for personal use.


